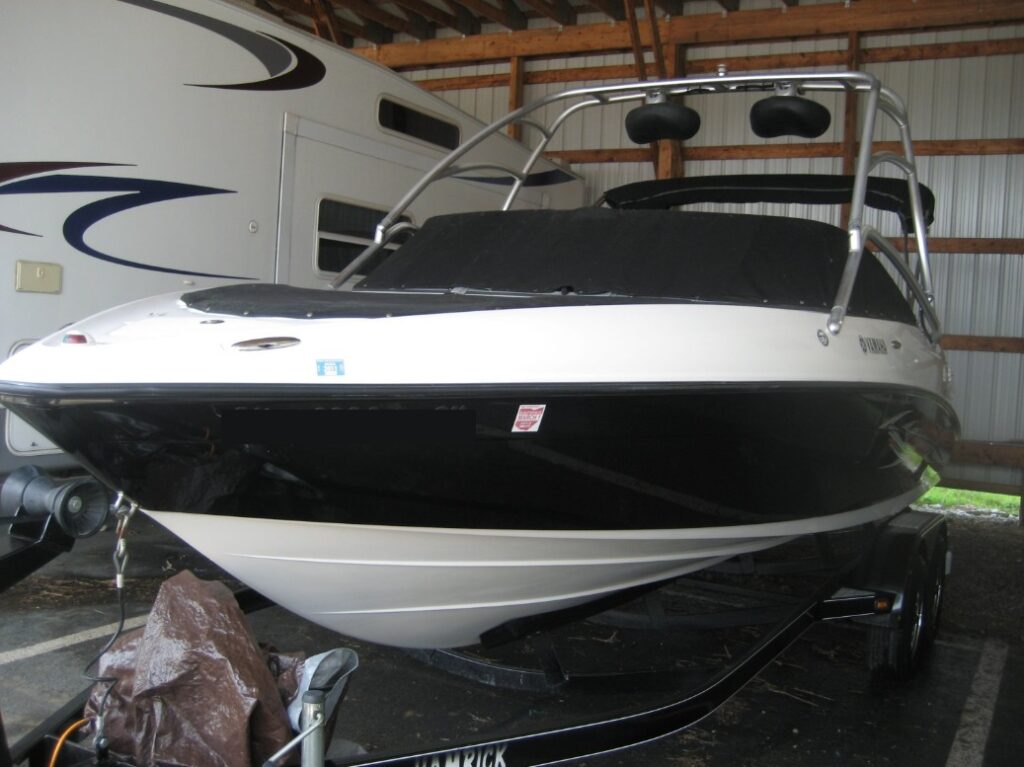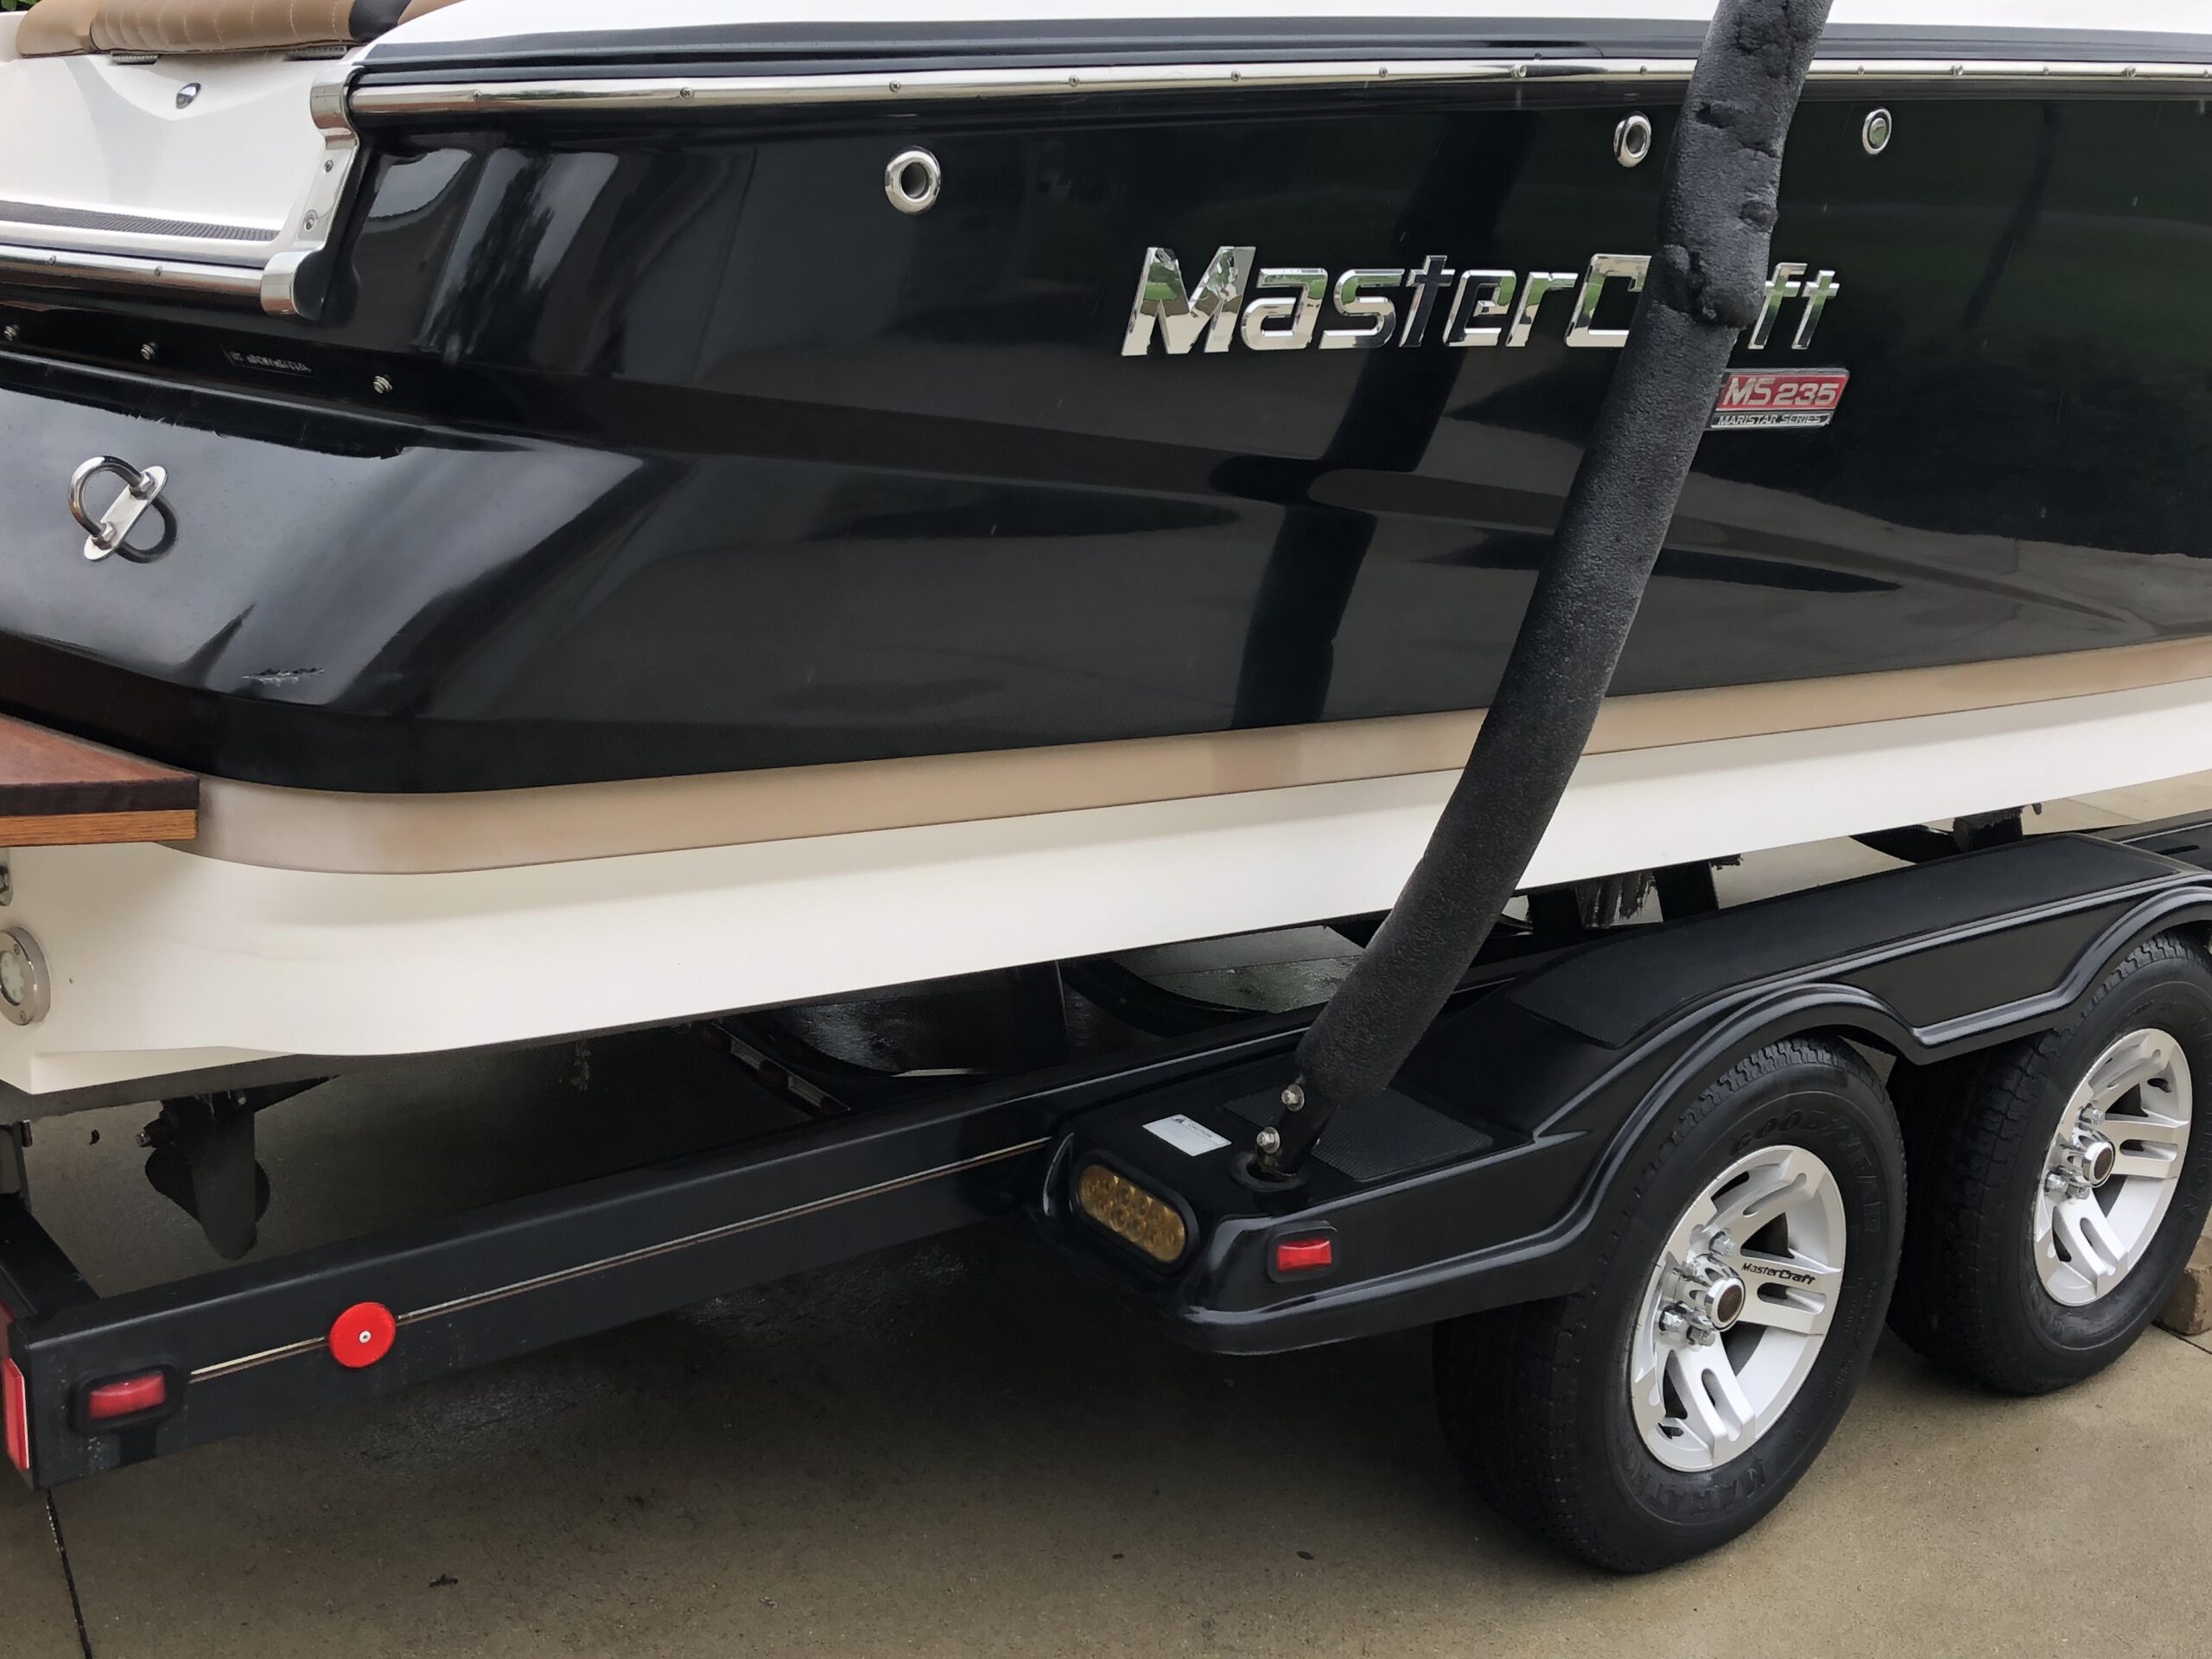
...

Should You Wax a Boat Before Winter Storage? What It Helps Protect

Yes, waxing a boat before winter storage is usually worth doing because it adds a sacrificial layer between the boat’s finish and months of moisture, dust, dirt, staining, and environmental exposure. A properly cleaned and waxed gel coat is also easier to wash in spring and less likely to emerge from storage looking chalky or neglected.

For boat owners in Ohio, that end-of-season protection can be especially valuable. The U.S. Coast Guard reported 630,288 registered recreational vessels in Ohio in 2024, and many of those boats spend months out of the water during the state’s long offseason.

At Speedy K’s, Kevin has been working around boats since he was about 15 years old, when he grew up near Lake Erie and saw firsthand how much maintenance boats required. Over roughly 35 years, that experience expanded into formal product training, studying how gel coats are manufactured, working with manufacturers, and even practicing restoration techniques on salvage-yard boats before using them on customers’ vessels.

That experience points to a simple lesson: protecting a boat is not about finding one miracle product. It is about consistent maintenance.

Should You Wax a Boat Before Winter Storage? What It Helps Protect Most

Waxing before winter storage primarily helps protect the exposed finish of your boat. On fiberglass boats, that generally means protecting the gel coat against staining, grime, environmental contaminants, and the gradual dulling that can occur when a surface is left unprotected.

Marine manufacturers make similar recommendations. Mercury Marine notes that waxing helps a hull repel dirt, mud, insects, and water staining, while also making whatever does stick easier to clean later.

Think of wax as a temporary barrier rather than permanent armor. Kevin often reminds customers that no coating eliminates future maintenance. Even the best protective product still has to be maintained and eventually reapplied.

For a boat that already looks faded or chalky, wax alone may not correct the problem. That is when services such as Boat Gel Coat Restoration may need to come before the protective step.

What Does Boat Wax Actually Protect During Storage?

A boat does not stop being exposed to contaminants simply because it is no longer in the water. Dust settles. Moisture can develop. Covers can move. Unheated buildings experience temperature swings.

A quality marine wax or sealant can help protect against several common issues:

  • Water spotting and mineral residue
  • Dirt and airborne contaminants
  • Light staining
  • UV exposure when a boat receives sunlight
  • Loss of gloss
  • Contaminants sticking firmly to the gel coat

The benefit becomes especially noticeable when the cover comes off in spring. A protected surface normally releases accumulated grime more easily than an unprotected, porous-feeling finish.

That matters because aggressive spring cleaning can create problems of its own. The more scrubbing, harsh chemicals, or repeated correction a surface requires, the more unnecessary wear you may put on the finish.

Kevin’s approach at Speedy K’s has always been to understand what the surface actually needs first. His team studied gel coat construction, fiberglass, paint systems, compounds, sealants, and manufacturer recommendations rather than simply grabbing a product off the shelf.

White bowrider boat on a lift under a covered dock

Is It Better to Wax or Polish a Boat?

Polishing and waxing perform different jobs.

Polishing is primarily about correcting or improving the surface. Waxing is primarily about protecting it afterward.

If a gel coat is already glossy and in good condition, cleaning followed by wax may be enough before storage. If it is faded, oxidized, hazy, or covered in fine defects, simply putting wax over the surface can lock in an appearance you were hoping to improve.

That is why the order matters.

Clean first. Correct the surface if necessary. Then protect it.

Our guide, Is it better to polish or wax a boat?, goes deeper into the difference.

For boats with visible fading, professional Gel Coat Oxidation Removal may be needed before wax or sealant is applied. The same applies when Boat Gel Coat Polishing is necessary to restore clarity and gloss.

How Long Does Wax on a Boat Last?

There is no single lifespan for boat wax.

How long protection lasts depends on the product, how the boat is stored, how frequently it is used, sun exposure, washing methods, water conditions, and the condition of the surface underneath.

A boat stored indoors through winter may retain protection differently from one sitting outside under a cover. Likewise, a boat that spends summer exposed to intense sun and frequent washing will generally require more frequent attention.

Kevin has seen the same pattern across boats, RVs, cars, and aircraft. Maintenance schedules work better than waiting until the finish visibly fails.

He also recommends looking at manufacturer guidance whenever possible. Some boat and engine manufacturers provide surprisingly detailed maintenance recommendations for surfaces, upholstery, sealants, and other components.

The idea is not to wax continuously. It is to inspect the finish and maintain it before deterioration becomes difficult to correct.

What Are Common Boat Storage Mistakes?

One of the biggest mistakes is thinking winter storage begins and ends with covering the boat.

The boat should be thoroughly cleaned before it is put away. Allowing lake residue, insects, grime, bird droppings, or water staining to sit for months can make spring cleanup much harder.

Moisture is another concern. Mercury Marine recommends thoroughly draining systems that can hold water and preventing additional water intrusion during storage. The company also stresses proper ventilation because trapped condensation can contribute to mold and mildew.

You can review the full Mercury Marine guide to storing a boat for winter for additional winterization guidance.

Another mistake is ignoring the cover after the boat is stored. The BoatUS Foundation tested covers on boats during a Maryland winter and found that many required additional support as water accumulated or fabric stretched. Their guidance recommends checking stored boats at least monthly and after heavy rain or snow.

A clean, protected finish is helpful. A properly supported, ventilated storage setup is just as important.

Black and white wake boat on a trailer with a polished gel coat finish

What Is the Best Marine Boat Wax?

The best boat wax is not necessarily the most expensive container on the shelf.

It needs to be compatible with the surface you are treating and suitable for a marine environment. Fiberglass gel coat, painted surfaces, graphics, plastics, metals, and other materials may require different products or techniques.

This is an area where Kevin is particularly cautious.

Over the years, Speedy K’s has experimented with products, worked with chemical formulations, studied manufacturers’ recommendations, and developed systems based on what actually performs. Kevin has also seen how easy it is for owners to buy a heavily marketed product expecting results that the product simply cannot deliver.

Marine environments are demanding. Yamaha notes that boats and outboards deal with water, contaminants, moisture, sun, and other harsh conditions, which is why marine-specific products are generally the safer choice.

Before applying anything, read the product directions and your boat manufacturer’s recommendations. Testing an inconspicuous area first is also smart when you are using a new product.

How Many Coats of Wax Should I Put on My Boat?

More wax does not automatically equal more protection.

For many products, one complete and properly applied coat is more valuable than several rushed coats. Some marine waxes or sealants may allow or recommend an additional coat after the first has cured, but the manufacturer’s directions should determine that.

Surface preparation matters even more.

Putting three coats of wax over oxidation does not correct oxidation. Putting extra product onto a dirty surface does not create better protection either.

A clean, corrected, properly prepared surface allows the protective product to do its job.

This is similar to something Kevin frequently tells customers about long-term protection. There is no product that you apply once and then forget for years. Boat finishes require upkeep, just like engines, upholstery, trailers, and other components.

Does Waxing the Bottom of an Aluminum Boat Make It Go Faster?

You should not expect waxing the bottom of an aluminum boat to create a meaningful speed increase.

A cleaner hull can reduce unnecessary drag caused by heavy buildup, marine growth, or contamination, but waxing should primarily be viewed as a maintenance and appearance decision rather than a performance modification.

There is also an important distinction between fiberglass gel coat and bare or painted aluminum. They are different surfaces and should not automatically receive the same products.

If you own an aluminum boat, check the manufacturer’s care instructions before putting wax, polish, compound, or another treatment below the waterline.

A clean hull is worthwhile. Chasing speed by applying extra wax is unlikely to be the reason to do it.

Wax Before or After the Boat Is Covered?

Wax the boat before installing its winter cover.

Ideally, the boat should first receive a thorough wash so insects, water spots, grime, and other contaminants are not trapped beneath the protective layer. Once clean, inspect the gel coat under good lighting.

If the surface looks dull, address that before moving directly to wax.

After correction and protection, allow the product to cure according to its instructions. Then make sure the boat itself is dry before it is covered or shrink-wrapped.

This final detail matters. A beautiful exterior does not compensate for moisture trapped inside compartments, upholstery, carpeting, or storage areas.

Winter prep works best as a complete process rather than a single detailing step.

Protect Your Boat Before Winter Storage

Should you wax a boat before winter storage? In most cases, yes. Waxing gives a clean, healthy finish another layer of protection while the boat sits unused and can make spring cleanup considerably easier.

Just do not treat wax as a cure-all.

If the gel coat is already oxidized, faded, heavily stained, or damaged, correcting the finish first will produce a better result. Kevin and the Speedy K’s team have spent decades learning that proper results come from understanding the material, using the correct process, and keeping up with maintenance instead of waiting until a surface is badly deteriorated.

Winter storage is a good opportunity to get ahead of that deterioration. Clean the boat thoroughly, evaluate the finish, correct what needs attention, apply appropriate protection, let everything dry, and cover the boat correctly.

Your first spring cleanup may be much easier because of it.

Glossy white yacht hull with restored gel coat and reflective finish

What Does Professional Boat Interior Detailing Include?

What does professional boat interior detailing include? A proper interior detail goes far beyond vacuuming seats and wiping down the dash. It typically includes deep cleaning marine vinyl, upholstery, carpets, flooring, storage areas, glass, plastics, cupholders, compartments, and other high-touch surfaces, followed by material-appropriate conditioning or protection where needed.

The goal is not simply to make the boat look cleaner for a weekend. Good interior detailing removes the grime, sunscreen, moisture residue, mildew concerns, stains, and everyday buildup that can slowly damage materials. Done correctly, it also makes regular upkeep much easier between professional services.

What does boat detailing include?

Boat detailing can include exterior washing, oxidation removal, polishing, gel coat restoration, interior cleaning, vinyl treatment, carpet cleaning, mildew odor treatment, teak care, and protective sealants. The exact work depends on the boat, its condition, how it is stored, and how it is used.

For the interior specifically, Boat Interior Detailing should be approached surface by surface. A boat may have marine vinyl next to plastic trim, fiberglass, carpet, glass, painted surfaces, stainless hardware, and wood. Those materials should not all be attacked with the same cleaner or brush.

That is something Kevin at Speedy K’s learned early. He started working around boats when he was about 15 after growing up near the lake, then spent years studying how boats and gel coats were actually made. Instead of simply buying a bottle off a store shelf, he trained, spoke with manufacturers, and even practiced techniques on salvage-yard boats.

What Does Professional Boat Interior Detailing Include?

A professional interior service normally begins with an inspection. Before cleaning starts, the detailer needs to understand what is dirt, what is staining, what is mildew, and what may already be permanent damage. That distinction matters because aggressive cleaning can sometimes make a damaged surface worse.

From there, the work may include vacuuming and cleaning carpet, washing hard flooring, cleaning seats and seat backs, treating vinyl, wiping dashboards and consoles, cleaning cupholders, removing grime around seams, cleaning storage compartments, and addressing glass or clear surfaces. Depending on the package, odor or mildew treatment may also be appropriate.

The difference with Professional Boat Detailing is the process behind the cleaning. The goal is to use the right product, tool, pressure, and technique for each material rather than chasing a dramatic before-and-after result at the expense of the boat.

Close-up of a blue and white boat hull after exterior detailing

What does a full interior detail include?

A full interior detail generally goes into the areas that routine wipe-downs miss. That means seat seams, corners, storage spaces, under cushions when accessible, flooring edges, drink holders, helm surfaces, interior glass, trim pieces, and other places where moisture and debris collect.

Marine vinyl and upholstery

Seats are often the first thing owners notice. Sunscreen, body oils, food, dirt, moisture, and airborne debris can build up even when the vinyl does not look especially dirty. Marine Vinyl Cleaning should remove contamination without unnecessarily stripping the surface or damaging stitching.

This is one place where stronger is not always better. BoatUS recommends gentle cleaning methods for marine vinyl, noting that harsh scrubbing and caustic cleaners can damage protective treatments, vinyl, or thread over time.

Carpet, flooring, compartments, and hard surfaces

Carpet may need vacuuming, spot treatment, and deeper extraction depending on the material and condition. Hard flooring needs its own process. Compartments also deserve attention because closed, damp spaces are exactly where odors and mildew problems can develop.

Dash panels, plastics, glass, stainless pieces, and other hard surfaces should be cleaned with products compatible with their finish. A good detail is methodical. It is not one chemical sprayed across everything.

Why marine vinyl needs different treatment

Marine vinyl lives in a rough environment. It deals with UV exposure, moisture, sunscreen, sweat, food, lake water, temperature swings, and periods when the boat may sit covered with very little airflow.

That is why we do not treat a boat seat like a kitchen chair. Kevin’s philosophy has always been to understand what the manufacturer recommends and then maintain the material accordingly. Over decades, that approach led to continued training on coatings, fiberglass, paint systems, plastics, trim, and the products used to preserve them.

One of the biggest mistakes an owner can make is assuming a harsh chemical will solve a stubborn stain faster. It may lighten the stain while shortening the life of the material. Proper Boat/Watercraft Detailing balances cleaning power with preservation.

How to detail a boat interior?

Start by removing loose items and inspecting the interior before reaching for cleaner. Vacuum dry debris first so you are not turning dust, crumbs, and grit into wet grime. Then work from cleaner areas toward dirtier areas and use separate tools for different surfaces when necessary.

Clean vinyl and upholstery with products designed for those materials. Address stains carefully rather than automatically scrubbing harder. Clean the flooring, helm, glass, storage areas, cupholders, trim, and accessible compartments, then allow damp areas to dry properly before closing the boat back up.

For owners who do not want to transport the boat to a shop, mobile service can make the process easier. Our article How Does Mobile Boat Detailing Work? explains how the inspection, preparation, interior work, exterior work, specialized treatments, and final review can be handled where the boat is stored.

Black and white Yamaha boat prepared for professional boat detailing

How much does it cost to detail a 20 ft boat?

There is no single correct price for every 20-foot boat because condition matters as much as length. Speedy K’s currently lists mobile boat detailing packages starting at $9 per foot, which means a qualifying 20-foot package can start around $180. A complete interior service may cost more depending on what the boat actually needs.

Heavy mildew, staining, odor problems, neglected compartments, specialized restoration, or added exterior work can all change the final quote. Speedy K’s also offers custom packages because two boats with the same length can require very different amounts of labor.

That is why photos and a condition discussion are useful before the job. A lightly used 20-footer maintained several times each season should not be evaluated the same way as a boat that has sat covered, damp, and untouched for a year.

How often should a boat interior be professionally detailed?

The best schedule depends on usage, storage, and exposure. A boat used every weekend will collect sunscreen, food residue, moisture, dust, and traffic much faster than a boat used a few times during the summer.

Kevin often emphasizes maintenance rather than miracle products. In his experience, regular professional upkeep can make routine cleaning surprisingly easy because dirt and debris do not get as much opportunity to bond, stain, or accumulate. Manufacturer recommendations should always be part of that maintenance plan.

Between appointments, wipe up spills quickly, keep the interior as dry as practical, provide ventilation when appropriate, and avoid letting grime sit on vinyl for weeks. Those small habits do more for long-term condition than waiting until the interior looks terrible.

Why professional boat detailing is about preservation, not just appearance

The biggest value of a professional interior detail is knowing when to clean, when to protect, and when to stop. Some stains are surface contamination. Other marks are discoloration, deterioration, cracking, or damage that cleaning cannot reverse.

Kevin has seen this throughout roughly 35 years of detailing. Owners understandably want a boat to look new again, but once a material is physically damaged, there are limits to what cleaning can accomplish. A trained detailer should explain that instead of using increasingly aggressive products and hoping for a miracle.

That same mindset is why Speedy K’s focuses so heavily on training, manufacturer guidance, proper tools, and realistic maintenance. The best detail does not simply produce a clean boat on service day. It helps protect the interior so the owner can enjoy it longer.

If your seats are stained, compartments smell musty, flooring is holding grime, or the entire interior simply needs a reset, a professional service can address those areas in one organized process. More importantly, it gives each material the type of care it actually needs.

Blue and white boat outdoors after professional boat cleaning and detailing

How do I know if my boat’s gel coat is oxidized?

A boat can look clean and still have an oxidized gel coat. Dirt usually washes away, but oxidation leaves the surface dull, chalky, faded, or uneven even after a thorough cleaning. You may also notice that the hull no longer reflects light clearly or that darker colors have lost their depth.

So, how do I know if my boat’s gel coat is oxidized? Start by looking at the finish in direct daylight, then run a clean hand or dark microfiber towel across it. If the surface leaves behind a powdery residue, feels dry, or refuses to shine after washing, oxidation is a likely cause.

Close-up of an oxidized black boat hull with heavy chalky buildup before detailing by Speedy K’s.

What does oxidized gelcoat look like?

Oxidized gel coat usually looks cloudy rather than glossy. White boats may appear flat, yellowed, or slightly gray, while blue, red, and black sections often become pale or patchy. The finish may look better when wet, only to turn dull again as soon as it dries.

One of the clearest signs is a chalk-like residue. Wipe a small area with a clean, dark towel. If white or colored powder transfers to the towel, the outer layer of gel coat is breaking down and needs more than ordinary washing.

Oxidation can also appear unevenly. Areas that face the sun, sit above the waterline, or remain uncovered during storage often fade first. Decals, fittings, and covered sections may leave behind sharper, darker outlines that show how much the exposed gel coat has changed.

How do I know if my boat’s gel coat is oxidized or simply dirty?

Wash a small test section with a proper marine soap, rinse it well, and let it dry completely. If the original shine returns, you were probably dealing with dirt, minerals, or surface staining. If the area still looks milky or faded, the problem is likely oxidation.

Water spots and organic stains can also make gel coat look neglected, but they usually have defined edges or appear in specific areas. Oxidation is more likely to create a broad, uniform loss of gloss. It can cover an entire side of the hull or gradually worsen from the top down.

I also recommend comparing exposed gel coat with a protected area, such as beneath a snap-on cover, fitting, or registration decal. That contrast can be eye-opening. A noticeably richer color underneath confirms that sunlight and exposure have worn down the surrounding finish.

Black and white wake boat on a trailer with a glossy gel coat finish

Try a small polish test

Apply a marine polish to a discreet test spot according to the product directions. If the color and gloss return, the oxidation is probably light enough to correct with polishing or compounding. If the improvement is minimal, the damage may be heavier or the gel coat may already be too thin for aggressive correction.

What causes gelcoat to oxidize?

Ultraviolet exposure is one of the biggest causes. Gel coat protects the fiberglass underneath, but years of sunlight gradually break down its surface. Heat, moisture, road grime, and water contaminants can speed up the process.

Storage habits matter too. A boat left uncovered outdoors will normally oxidize faster than one stored indoors or under a well-fitted cover. Even a covered boat can develop problems when moisture becomes trapped or the finish is not cleaned and protected before storage.

Harsh cleaners are another common issue. Strong chemicals may remove waxes, sealants, and other protection, leaving the gel coat exposed. As Kevin from Speedy K’s often explains, proper maintenance should follow the manufacturer’s recommendations rather than relying on whatever product happens to be sitting on a store shelf.

Can you buff out oxidation?

Yes, many cases of light or moderate oxidation can be buffed out. The process normally begins with washing and decontaminating the surface, followed by a suitable compound or polish. A protective wax or sealant is then applied after the gloss has been restored.

The key is matching the correction method to the condition of the gel coat. Light oxidation may respond to a cleaner wax or mild polish. Moderate oxidation may require machine compounding, while severe cases can call for wet sanding before polishing.

More aggressive is not always better. Gel coat is thicker than automotive clear coat in many applications, but it is not unlimited. Excessive pressure, the wrong pad, poor technique, or repeated heavy cutting can create swirl marks, uneven color, or permanent damage.

A helpful overview is available in the BoatUS guide to restoring gel coat. For anything beyond light oxidation, professional evaluation is the safer choice.

How do you restore faded gelcoat on a boat?

Restoration should begin with an honest inspection. A professional will look at the color loss, surface texture, previous repair work, decals, graphics, edges, and the amount of material available for correction. That inspection determines whether the boat needs polishing, compounding, wet sanding, repair, or a combination of steps.

Kevin’s approach comes from decades of studying how boats and their gel coats are made, speaking with manufacturers, attending technical training, and practicing on salvage-yard boats. That matters because restoration is not simply applying a product and running a buffer over the hull. The system, tools, pad choice, product choice, and technique all affect the final result.

For a closer look at the overall process, read How to Restore Faded Gelcoat on a Boat. It explains why faded gel coat needs correction and protection rather than a temporary shine that disappears after the next wash.

When oxidation becomes a gel coat repair issue

Oxidation affects the outer surface, but not every faded or damaged area can be solved through polishing. Deep cracks, chips, gouges, exposed fiberglass, blistering, or sections where the gel coat has worn away require actual repair. Buffing may improve the surrounding shine, but it cannot replace missing material.

Color inconsistency can also remain after correction. Older boats may have gel coat that has faded deeply or been repaired with a poor color match. In those cases, Boat Gel Coat Repair may involve filling, leveling, color matching, and refinishing rather than polishing alone.

This is where expectations need to be realistic. Kevin often compares severely damaged finishes to a failed computer hard drive: once essential material is gone, there are limits to what surface correction can recover. A skilled professional should explain those limits before work begins.

Wide view of a black boat on a trailer showing severe hull oxidation and streaking before professional boat detailing.

Signs you may need professional boat gel coat restoration

A small, lightly oxidized area may be manageable for an experienced boat owner. Large hulls, dark colors, heavy chalking, previous sanding marks, damaged graphics, and severely faded surfaces are different. These conditions require more control and often multiple correction stages.

Professional Boat Gel Coat Restoration may be the better option when the boat still looks dull after hand polishing, oxidation quickly returns, or the surface has several different levels of damage. A trained detailer can test a section and choose the least aggressive effective method.

Searching for Boat Gel Coat Restoration Near Me should involve more than comparing prices. Ask about experience with marine gel coat, insurance, correction methods, test spots, and how the finish will be protected afterward. Be cautious with companies that collect payment through a subcontracting hub but do not clearly identify who will perform the work.

How to keep oxidation from coming back

Restoration is only the first half of the job. Once the gloss returns, the surface needs ongoing protection and sensible care. No coating eliminates maintenance forever, regardless of what an advertisement promises.

Wash the boat with manufacturer-appropriate products, avoid unnecessarily harsh chemicals, and remove contaminants before they sit for months. Keep the boat covered or stored indoors when practical. A clean, well-fitted cover can slow fading.

Protection should be renewed on a schedule that matches the boat’s use, storage, and exposure. Boats that remain outdoors or spend long periods in direct sun may need attention several times during the season. Kevin’s advice is simple: treat the finish like any other investment that needs routine upkeep, not a one-time fix.

Do not wait until the gel coat looks severely damaged

Early oxidation is easier and safer to correct than years of neglected chalking. If your boat looks glossy while wet but turns faded when dry, leaves powder on a towel, or no longer reflects light evenly, schedule an inspection before the condition worsens.

The answer to “How do I know if my boat’s gel coat is oxidized?” often comes down to three signs: fading, chalky residue, and a lasting loss of gloss after washing. Catch those signs early, use the right correction process, and protect the finish afterward. Your boat will look better, be easier to maintain, and hold onto its appearance much longer.

Close-up of a black and white MasterCraft boat on a trailer with a glossy gel coat finish

How to Remove Mold and Mildew From Boats

Mold and mildew don’t just look ugly on your boat—left unchecked, they can cause musty odors, damage upholstery, and even pose health risks. As a lifelong boating enthusiast, I’ve faced down my share of fuzzy spots and black streaks on seats, carpets, and cabin panels. The first time it happened, I assumed it was just dirt. A quick wipe didn’t help, and the smell lingered. I soon realized I was battling mold and mildew, and I needed a clear plan to save my boat’s cushions and keep those spores from returning.

In this guide I’ll walk you through how to remove mold and mildew from boats using proven methods that balance effectiveness and safety. You’ll learn what kills mold, how to tackle different surfaces, why prevention is your best friend, and when it’s time to call in professionals. I’ll share my own experiences along the way so you can see what works in the real world.

Understanding Mold and Mildew on Boats

Boats live in humid environments. When you add warm temperatures, splashing water, and limited air circulation, you have the perfect recipe for mold and mildew. I’ve seen mildew pop up after just a few days of summer rain; left untreated, it can turn into black mold and spread quickly. Mold spores germinate on organic materials like wood, fabric, carpet, or even dust on fiberglass. Spores can begin to grow within 12–48 hours if moisture and warmth are present.

Common breeding grounds include under-seat storage compartments, carpeted floors, inside lockers, vinyl seats, and in the bilge. Anywhere water can sit or dampness remains is a risk. Ventilation is often limited below deck, so stale air helps mold thrive. I learned this lesson one spring when a forgotten life jacket buried under other gear developed a foul smell and black blotches.

How to Remove Mold and Mildew From Boats

Step-by-Step Cleaning Process

Before you start cleaning, assess the affected areas and assemble the right tools. For basic cleaning, you’ll need gloves, eye protection, a soft-bristle brush, a microfiber cloth, a bucket, and your cleaning solution. Always work in a well‑ventilated area or outdoors. Here’s the process I follow:

  1. Ventilate and inspect – Open hatches, doors, and windows to air out the boat. Use a fan if possible to move air through the cabin. Walk through every compartment and check for visible mold, mildew, or musty odors.
  2. Remove loose debris – Vacuum or use a soft brush to remove dirt and debris. Mold feeds on organic material, so cleaning up leaves and crumbs reduces food sources. Pay close attention to corners, seams, and textured surfaces.
  3. Apply a mold and mildew cleaner – Choose a cleaner that’s safe for marine surfaces but tough on mold. You can use commercial marine mildew removers, a vinegar solution, or oxygen‑based cleaners like OxiClean. Apply the solution with a spray bottle or cloth and let it sit 10–15 minutes to break down the mold. Mild soap and water should always be your first line of defense; move to stronger cleaners only if needed.
  4. Scrub and rinse – Gently scrub with a soft brush or sponge. Avoid anything that could tear vinyl or upholstery. Once the mold is removed, rinse with clean water and wipe away excess moisture.
  5. Dry completely – This is the most important step. Mold will return if moisture remains. Use towels, a fan, or even a dehumidifier to dry the boat thoroughly. I once skipped this step and found mildew growing again within a week—lesson learned!

What kills mold in a boat?

The best way to kill mold is to use a cleaner that breaks down spores and inhibits regrowth. Marine‑specific cleaners often contain benzalkonium chloride or quaternary ammonium compounds that kill mold spores on contact. In my experience, starting with mild cleaners and escalating only if needed is the safest approach.

  • Vinegar solutions: Equal parts white vinegar and water are effective on light mold and mildew and safe for most surfaces. Vinegar is natural and non‑toxic; I often use it on fibreglass, vinyl, and even boat carpets. Catamaran Gurus notes that distilled white vinegar is a favorite onboard because it retards mold growth on wood and cleans interior surfaces.
  • Hydrogen peroxide: Mix equal parts 3 % hydrogen peroxide and water for a bleach‑free option. Test a small spot first because hydrogen peroxide can lighten some fabrics. Better Boat notes that a mixture of one part 3 % peroxide and two parts water creates a safe, eco‑friendly cleaner for carpets and seats.
  • Oxygen‑based cleaners (like OxiClean): These cleaners rely on sodium percarbonate, which breaks down into hydrogen peroxide and sodium carbonate. Catamaran Gurus explains that OxiClean can remove stains on canvas, fibreglass, teak, and sails without damaging fabric. Mix the powder with warm water, apply to the affected area, let it sit, then scrub and rinse.
  • Bleach solutions: Household bleach can kill stubborn mold and mildew, but it must be diluted and used with caution. Practical Sailor recommends a solution of 10 % household bleach to 90 % water for spot cleaning. Bleach should never be used on nylon or stitched fabrics because it can weaken material. Always wear gloves and work in a well‑ventilated area.
  • Commercial marine cleaners: Many marine mildew removers are chlorine‑free and safe for fabrics, though they may require more elbow grease. Products that use ammonium chloride or hydrogen peroxide are less harsh but still effective.

When tackling mold, avoid abrasive products like borax or baking soda on vinyl. These can scratch surfaces and leave micro‑damage where mold can hide. Choose products designed for marine use when possible.

How to Remove Mold and Mildew From Boats

Can I use OxiClean on my boat?

Yes. OxiClean is an oxygen‑based cleaner that works well on fabrics, carpets, and vinyl. Catamaran Gurus recommends OxiClean for everything from soaking laundry to cleaning canvas bimini tops. The active ingredient, sodium percarbonate, releases hydrogen peroxide when mixed with water, which breaks down stains and mold without the harshness of chlorine.

To use OxiClean:

  1. Mix according to the product instructions, typically one scoop per gallon of warm water.
  2. Apply the solution to the moldy area using a spray bottle or sponge.
  3. Let it sit for 10–15 minutes so the oxygenated bubbles can work on the mold.
  4. Scrub gently with a soft brush and rinse thoroughly.

Always test on a small, hidden area first to ensure it doesn’t discolor the material. Avoid using OxiClean on aluminum or untreated metal because the solution can cause discoloration.

What kills black mold immediately?

Black mold is more stubborn than ordinary mildew. A stronger cleaner is needed to kill it quickly. Bleach‑based cleaners and commercial mold removers with high concentrations of sodium hypochlorite are particularly effective. Practical Sailor’s tests found that cleaners with high bleach content, like Klean‑Strip, removed black mold from vinyl in one application. However, high‑chlorine cleaners can damage fabrics and may not be safe on cushions or stitching.

For black mold on hard surfaces like fiberglass, mix one cup of household bleach with one gallon of water. Apply it with a sponge, let it sit for 15–20 minutes, then rinse thoroughly. Wear gloves and eye protection, and ensure good ventilation. For porous materials or fabrics, start with non‑chlorine cleaners and repeat the process as needed—multiple treatments may be necessary.

Will vinegar kill mold on a boat?

Yes, distilled white vinegar can kill many types of mold on non‑porous surfaces. The Rub ’n Restore guide notes that lemon juice and distilled white vinegar are non‑toxic and effective against numerous mold species. Apply vinegar directly to the moldy area, let it sit for at least 30 minutes, then scrub and rinse. Vinegar is most effective on light mold and mildew; severe infestations may require stronger treatments.

Vinegar has a strong smell that dissipates quickly. It’s safe for most surfaces but can be corrosive to some metals. If you’re cleaning metal fixtures, wipe them dry after applying vinegar, and avoid extended contact.

Don’t Forget the Hidden Spots

Mold loves hidden, damp places. Some of the worst outbreaks I’ve seen weren’t on seats or carpets but in overlooked spaces. Check these spots regularly:

  • Under seats and cushions – Lift seats and open hidden compartments. I once found mold under a bench seat because a wet life jacket had been stuffed there.
  • Inside lockers and cabinets – Damp towels, ropes, or inflatables can trap moisture. Air out lockers after each outing.
  • Behind panels and in bilges – Water collects in bilges after rain or washing. Use a bilge pump and dry the area completely.
  • Canvas covers and carpets – Don’t forget boat covers and removable carpets. Wash and dry them thoroughly before storage. Better Boat advises using HEPA vacuums to remove spores before scrubbing carpet.

Making hidden areas part of your cleaning routine saves hours of work later. It takes a few minutes to check compartments after every outing, but it prevents major mold infestations.

Preventing Mold and Mildew From Coming Back

The best way to deal with mold is to stop it before it starts. Prevention is about keeping your boat dry, clean, and well‑ventilated.

  • Dry surfaces after each use – Wipe down seats, floors, and hardware. Use a squeegee on windows and decks. Remove wet gear.
  • Use moisture absorbers or dehumidifiers – Moisture‑absorbing products keep humidity low in storage compartments. A small dehumidifier can make a big difference in humid climates.
  • Ventilate during storage – Whenever possible, store your boat in a breathable cover rather than a solid tarp. Open hatches and install vents to improve airflow. Better Boat recommends airing out the cabin and using a HEPA vacuum before cleaning carpets.
  • Regular inspections and cleaning – Make mold inspections part of your regular maintenance. Mild soap and water or vinegar can handle early signs of mildew before they become major problems.
  • Choose the right boat storage – Storing boats properly prevents moisture buildup. For more detailed storage tips, check out the article What’s the Best Way to Prevent Mold and Mildew in Boat Storage?. It offers insights on ventilation, moisture barriers, and product recommendations that complement the strategies outlined here.

When to Call the Pros

Sometimes mold problems are too big to handle on your own. If you’re dealing with widespread mold that returns quickly or you’re concerned about damaging expensive upholstery, it may be time to call professional detailers.

Services like Boat Detailing Services, Boat/Watercraft Detailing, or a full Boat Detailing package can deep-clean your boat from bow to stern. Professionals use specialized cleaners and extraction tools to remove mold from hard‑to‑reach places and protect surfaces with appropriate sealants. I once hired a pro detailer after a severe storm left my cabin soaked; the job would have taken me days, but a team cleaned and dried everything in an afternoon while applying protective treatments I wouldn’t have had access to.

Professional detailing is also a wise investment when prepping your boat for sale. Clean, mold‑free boats command higher resale values and show potential buyers that you’ve cared for your vessel.

Frequently Asked Questions

Can I use bleach on my boat seats?

Bleach can kill mold quickly, but it may damage vinyl or weaken stitching if used repeatedly. Use it sparingly and only on hard, non‑porous surfaces. For seats and fabrics, stick with marine‑specific or oxygen‑based cleaners.

Is pressure washing a good idea for removing mold?

No. Pressure washing can force water and spores deeper into materials. Instead, use a soft brush and gentle cleaning solutions.

How often should I clean my boat to prevent mold?

Regular maintenance is key. During boating season, clean and dry the boat at least monthly. Inspect seats, carpets, and storage compartments after each use and treat any spots immediately.

What natural products fight mold?

Besides vinegar and hydrogen peroxide, non‑toxic solutions include tea tree oil (add about 10 drops to two cups of vinegar), borax paste (mix with water and scrub), or lemon juice and salt. These are gentle on surfaces and environmentally friendly.

Can I prevent mold just by using covers?

Covers help, but they must be breathable. A tarp that traps moisture can make mold worse. Choose covers with ventilation panels or use moisture absorbers underneath.

Final Thoughts

Dealing with mold and mildew isn’t the most glamorous part of boat ownership, but it’s essential for keeping your vessel safe, comfortable, and valuable. With the right tools, a solid cleaning routine, and regular maintenance, you can keep mold at bay. Start with gentle cleaners like vinegar and hydrogen peroxide; move to stronger solutions like oxygen‑based cleaners or diluted bleach only when necessary. Always remember to dry your boat thoroughly and address damp spots quickly to prevent mold from returning.

If you’re ever unsure or the task feels too big, don’t hesitate to call professionals. Their expertise and specialized tools can save you time and protect your investment. Whether you prefer a hands‑on DIY approach or want to invest in professional care, following these steps will help ensure your boat stays fresh, clean, and ready for your next adventure.

How to Remove Mold and Mildew From Boats

How to Detail a Boat with Teak Wood Surfaces

Cleaning and protecting teak is one of those rituals that separates a well‑loved vessel from a neglected one. When I started working on boats in Ohio, I quickly realized that teak doesn’t take care of itself. Its natural oils repel water and resist decay, but the sun, salt and grime of daily use strip away those oils. The result is a dull, weathered surface that can crack and deteriorate if left unchecked. As someone who cares about boats, I’ve learned that the secret is a disciplined approach to How to Detail a Boat with Teak Wood Surfaces. This guide walks you through the process step by step and offers practical answers to common questions.

Why Teak Wood Needs Special Attention

Teak has been prized for centuries because it combines strength with a beautiful grain pattern and a warm golden hue. Those qualities come from the wood’s density and natural oil content, which repel moisture and slow decay. But the same oils that make teak durable also dry out when exposed to ultraviolet light and saltwater spray. As the oils evaporate, the wood becomes porous and rough; dirt and mildew penetrate the grain, and the once‑rich colour fades to silvery gray. Neglecting maintenance doesn’t just affect appearance—it shortens the life of the deck or trim and may lead to costly repairs later. At Boat/Watercraft Detailing and Boat Detailing Services, we see these issues all the time, so we encourage boaters to invest in regular care.

If you’ve never tackled teak maintenance before, don’t be intimidated. You don’t need harsh chemicals or industrial machines; in fact, aggressive power washing and heavy sanding can damage the soft surface. A gentle routine preserves the wood’s integrity and keeps your boat looking sharp between professional Boat Detailing appointments.

How to Detail a Boat with Teak Wood Surfaces

Choosing the Right Cleaning Tools and Techniques

The first step in detailing teak is cleaning. It’s important to remove salt deposits, oil, and mildew so your wood can accept a brightener and sealer later. Experts recommend washing teak once a week with a soft brush or Scotch‑Brite pad and a mild detergent. Scrub across the grain, not with it; that way you lift dirt from the fibers without eroding the soft pulp. Never blast teak with a high‑pressure washer—teak may be a “hard” wood, but its surface is actually quite soft and can dent or groove under strong water jets.

For deep cleaning, a two‑part cleaner and brightener system works wonders on heavily greyed teak. The first stage gently dissolves embedded grime and old oils, while the second restores the natural golden colour without raising the grain. Make sure to rinse thoroughly after each step; any cleaner left on the deck can cause streaks or interfere with the finish. At Boat/Watercraft Detailing, we often use products designed specifically for teak because they provide a balance of cleaning power and gentleness. Better Boat’s teak cleaner, for example, penetrates the wood grain to lift stubborn dirt and mildew yet remains safe for surrounding fiberglass surfaces.

Once the deck is clean and dry, many owners are tempted to stop there. I get it—freshly scrubbed teak looks great. However, cleaning alone won’t protect the wood from sun and moisture. To keep that golden colour and protect your investment, you’ll need to brighten and seal the surface.

Is it Better to Oil or Seal Teak?

This question sparks lively debates at the marina. Traditionalists swear by teak oil, while many professionals prefer modern sealers. The truth is that each option has pros and cons.

Teak oil penetrates deeply into the wood, replacing natural oils lost to weathering and highlighting the grain with a warm, rich tone. If you love the classic look, oil is a good choice—just be prepared for regular upkeep. Oils tend to break down within a few months, especially in harsh sun and salt. They also attract dirt and mildew because the surface remains slightly tacky. At our Boat Detailing Services, we reserve oil for trim pieces or small accent boards that receive frequent attention.

Sealers, on the other hand, form a protective barrier on the surface that locks in moisture and blocks UV light. A high‑quality teak sealer with UV inhibitors prolongs the wood’s natural appearance and reduces maintenance. You’ll still need to clean the deck regularly, but you can often go a whole season before reapplying. Some boat owners apply two or three thin coats for even longer protection. A sealer won’t make the wood as dark as oil, but it will keep the grain crisp and reduce the risk of mildew.

My recommendation? Choose based on your aesthetic preference and maintenance tolerance. If you don’t mind reapplying every few months and prefer a rich amber tone, oil may work for you. If you’d rather spend your weekends sailing than working on the deck, invest in a modern sealer.

What are the Disadvantages of Teak Wood?

Teak may be the gold standard for marine decking, but it isn’t perfect. On the practical side, teak decks are expensive to install and add weight to the boat. They also absorb heat, becoming quite hot underfoot in direct sun. Maintenance is another drawback: as teak ages, it requires regular cleaning and sealing to prevent cracks and rot. The wood can be vulnerable to common spills like oil, diesel or wine, and you need to clean these promptly to avoid stains.

Environmental concerns also exist. Natural teak comes from slow‑growing trees and is increasingly sourced from plantations because wild stands are depleted. Sustainable products are improving, but you’ll want to research the origins of any teak you purchase. Finally, the very qualities that make teak durable—its density and silica content—also make it hard on saw blades and tools, which increases installation costs.

Despite these disadvantages, teak remains popular because it lasts decades when cared for properly and offers an unmatched non‑skid surface. The key is acknowledging the drawbacks and committing to regular maintenance or hiring Boat Detailing professionals to handle it for you.

Is Murphy’s Oil Soap Good for Teak Wood?

Many boat owners look for household alternatives to pricey teak cleaners, and Murphy’s Oil Soap often comes up. Teak furniture specialists say that for pieces that are just dirty (not weathered or damaged), Murphy’s Oil Soap can be an effective cleaner. It lifts dirt without removing too much of the wood’s natural oil. If you choose this route, use a soft nylon brush and scrub gently across the grain. Rinse thoroughly to remove any residue, and let the teak dry completely before applying oil or sealer.

However, Murphy’s Oil Soap isn’t a miracle solution. On exterior decks exposed to sun and salt, you will still need a dedicated teak cleaner to remove embedded grime and a brightener to restore colour. The experts at Teakworks4u warn that high‑pressure washing can ruin teak’s soft surface and recommend hand cleaning and low‑pressure rinsing instead. They also note that teak oil does not create a protective seal—it simply enhances colour. For the best results, use Murphy’s Soap for light cleaning indoors or on furniture, and rely on marine‑grade cleaners for your boat’s deck.

What Grit Sandpaper to Use on Teak?

Sanding teak is sometimes necessary to smooth out deep stains or prepare the wood for finishing. But over‑sanding can shorten the life of your deck, so choose your grit carefully. A light annual sanding removes surface roughness and gives the sealer a better bond. Professionals recommend starting with 80‑grit paper on the deck and finishing with 120‑grit on covering boards. The coarser 80‑grit cuts through ridges and leaves a slightly rough texture that provides traction; finer grits like 120 tighten the grain on trim pieces but can make surfaces slippery if used on the walking deck. Remember to sand evenly across the grain and vacuum or wipe away the dust before sealing.

If you’re dealing with major scratches or replacing boards, begin with a rougher grit such as 60 and work your way up to 80 or 100. Avoid sanding more than necessary, and never use power sanders at high speeds on thin planks—you can quickly remove too much material. When in doubt, leave sanding to professionals at Boat Detailing Services who know how to balance smoothness with longevity.

What are the Steps to Detailing a Boat?

Detailing a boat involves more than washing and polishing the hull—it includes caring for every surface, including teak decks. The process begins with a thorough inspection to identify problem areas like oxidation, mildew or scratches. After consultation, professional detailers set up protective barriers and bring all necessary equipment to your location. They clean the exterior, polish the gel coat, treat metals, and then move inside to clean and condition upholstery and other surfaces. Specialized treatments such as ceramic coating or polymer sealants provide an extra layer of protection.

If you’re curious about the entire detailing process, check out What are the steps to detailing a boat?. That guide breaks down each phase in detail and explains how mobile detailing can save you time and effort. It’s the same process our technicians follow when we provide Boat/Watercraft Detailing. Whether you want a full exterior restoration or a quick seasonal freshening, understanding the steps helps you appreciate the value of professional care.

How to Detail a Boat with Teak Wood Surfaces

Seasonal Maintenance Tips for Teak Surfaces

Even with proper sealing, teak decks need routine attention. A simple schedule ensures your boat stays in prime condition year‑round. Here’s what I suggest:

  • Spring: After winter storage, inspect your teak for cracks or raised caulk. Clean the surface and apply a fresh coat of sealer or oil if water no longer beads up. Address any mildew or black spots immediately.
  • Summer: Salt spray and intense sun demand frequent rinsing. Wash your decks after outings and look for signs of fading or wear. Spot clean spills—oil, fuel, and sunscreen can stain teak.
  • Fall: Before putting the boat away, perform a deep clean and apply brightener if needed. Remove cushions and clean underneath to discourage mildew. Consider applying a protective cover or storing removable teak furniture indoors.
  • Winter: If your boat remains in the water, inspect it periodically and brush off snow to prevent moisture buildup. For boats in storage, ensure good ventilation to avoid condensation. In freezing climates, avoid heavy sealants that might crack in extreme cold.

Following a seasonal routine prolongs the life of your teak and reduces the work required during peak boating season. If you don’t have time, schedule regular Boat Detailing Services and let professionals handle the upkeep.

Conclusion: Investing in Proper Boat Detailing

Teak decks add warmth and character to any vessel, but they require respect. I’ve seen too many boats suffer from neglected wood: cracked boards, loose caulking, and faded surfaces that detract from the overall value. The good news is that proper detailing—cleaning, brightening, and sealing—keeps teak looking spectacular and prevents structural problems down the road. By scrubbing gently across the grain, choosing appropriate cleaners and finishes, and maintaining a seasonal routine, you preserve the beauty of your boat and protect your investment.

Whether you take on the job yourself or work with Boat/Watercraft Detailing professionals, the key is consistency. Your boat’s teak surfaces don’t need to be a burden; they can be a point of pride. Next time you’re on the water, let the golden glow of your deck remind you that diligent care pays off. And if you’re ready to elevate your maintenance routine, contact Boat Detailing for specialized packages tailored to your vessel.

How to Detail a Boat with Teak Wood Surfaces

How to Protect Your Boat’s Fiberglass Between Details

Owning a boat means more than just enjoying bright afternoons on the water. It’s also about caring for your investment in between those memories. At Speedy K, we know firsthand that regular maintenance keeps a vessel looking sharp and performing well. When I first bought my own fiberglass craft, I assumed an occasional wax would be enough. After a particularly hot summer left the gelcoat chalky and dulled, I learned the hard way that a proactive routine is essential. Our Boat Detailing Services were born out of that lesson, and this guide lays out everything I wish I had known from day one.

Comprehensive Approach to Protecting Fiberglass

Fiberglass may seem tough, but it’s surprisingly vulnerable to ultraviolet (UV) radiation, salt, dirt, and oxidation. Between professional services, the best defence is simple and consistent care. That starts with washing the hull regularly using a gentle pH‑neutral soap that won’t strip away wax or ceramic coatings. Expert detailers suggest mixing a bucket of boat‑specific wash and water and using a soft mitt to avoid scratches. A thorough rinse with fresh water removes salt and debris, and a microfiber towel prevents spots.

After cleaning, spray sealants or quick detailers restore shine and maintain a protective layer. SiO₂‑based sprays fortify existing protection and add resilience against dirt and UV rays. When I’m short on time, a quick mist and wipe keeps the surface glossy until the next full detail. It’s also wise to inspect the hull and topsides for scuffs, scratches, or gelcoat blisters during each wash. Catching minor damage early makes it easier to fix and prevents bigger problems later.

Equally important is blocking sunlight whenever you’re not on the water. A high‑quality, breathable cover or indoor storage shields your boat from harsh UV rays. Combine that with regular washes and you’ll dramatically slow oxidation and color fading. And don’t forget to check hardware and rubrails; grime tends to accumulate there, and a quick wipe with a speed detailer restores their luster.

Product Strategies for Boat Care

Choosing the right products can be confusing, especially with so many marine cleaners and protectants on the market. Start with a good wash soap: it should be pH‑neutral to preserve coatings and safe for sensitive surfaces. Next, use a polymer‑based spray sealant or quick detailer after each wash. These sprays not only add gloss but also strengthen the barrier against UV, salt, and grime; think of them as your boat’s daily moisturizer.

For deeper protection, incorporate a UV‑resistant protectant. Products like 303 Aerospace Protectant are known for their ability to shield surfaces from harmful UV rays and moisture. This type of product acts like sunscreen for gelcoat, vinyl upholstery, and rubbers, preventing fading and cracking. Apply it evenly, wipe off the excess, and reapply every few months. Regularly using a protectant extends the life of both the fiberglass and the boat cover itself.

Once or twice a year, apply a high‑quality marine wax or polish. Waxes create a sacrificial barrier that helps water bead off and keeps contaminants from bonding to the gelcoat. If your boat has a ceramic coating, look for maintenance sprays specifically designed to pair with that coating. These products prolong the coating’s hydrophobic properties and keep the surface slick.

Below the waterline, consider an epoxy barrier coat to prevent osmosis blisters and water intrusion. An epoxy barrier coat sprayed on a properly prepared surface can stop further water permeation. While applying barrier coats is typically a professional job, understanding their role helps you decide when your vessel might need one. They form a waterproof membrane under antifouling paint, protecting the laminate from moisture and extending the hull’s service life.

How to Protect Your Boat's Fiberglass Between Details

Table: Protective Products and Their Purposes

Product TypePurposeExample
pH‑Neutral SoapGently cleans without stripping wax or coatingsBoat‑specific wash
Quick Detailer/SealantAdds gloss and strengthens UV/dirt barrierSiO₂‑based spray
UV ProtectantBlocks UV rays, prevents fading/cracking303 Aerospace Protectant
Marine Wax/Ceramic SprayLong‑term protection; hydrophobic barrierAnnual wax; ceramic maintenance spray
Epoxy Barrier CoatPrevents osmosis blisters and water intrusionProfessional epoxy barrier coat

Surface‑Specific Tips for Above and Below Waterline

Above the waterline, focus on UV protection and maintaining gloss. Rinse thoroughly after every outing, especially when boating in salt water. Then apply a quick detailer to restore shine and repel dust. On vinyl cushions and rubber seals, use a UV protectant with a non‑greasy finish; this keeps seats supple and prevents cracking.

Below the waterline, the priorities shift. Here, the primary threats are moisture ingress and marine growth. A professionally applied epoxy barrier coat is one of the best measures you can take. It forms a hard, waterproof layer that reduces the risk of blisters and improves antifouling paint adhesion. Regularly inspect the bottom for signs of damage, and consider reapplying the barrier coat every few years if your boat stays in the water for long periods.

Rubrails and trim pieces need attention too. These areas take a beating from docks and fenders; wiping them down with a speed detailer after each trip removes grime and restores their appearance. Also, remember to lubricate moving parts like hinges and latches to prevent corrosion.

What Is the 1/3 Rule in Boating?

Safety is as integral to boating as aesthetics. The “1/3 rule” is a simple fuel‑management guideline used by seasoned captains: one‑third of your fuel is for heading out, one‑third for returning home, and one‑third is reserved for emergencies. This conservative approach prevents being stranded because of unexpected weather, detours, or mechanical issues. It also reflects a broader philosophy—plan for the worst while enjoying the best.

At Speedy K, we apply a similar mindset to maintenance. Use one‑third of your time to enjoy the boat, one‑third to clean and protect it, and one‑third as a safety buffer for surprise repairs. Whether you’re taking advantage of our Boat/Watercraft Detailing services or caring for the vessel yourself, budgeting time and resources pays off in reliability and peace of mind.

What Is the Leading Cause of Death on Boats?

Understanding the leading causes of boating fatalities underscores why care and safety matter. Most accidents result from falling overboard and drowning, often because boaters aren’t wearing life jackets. Slippery decks and poor boat handling contribute to these incidents. Keeping the deck clean with non‑skid products, maintaining equipment, and practicing safe behaviors reduces risks.

We’ve had customers at Boat Detailing Services who were surprised to learn that a simple spill or algae buildup can turn a deck into a hazard. Regularly washing and drying surfaces not only protects the fiberglass but also prevents accidents. Pair that with proper safety gear and awareness of weather conditions, and you’ve covered the bases for both protection and prevention.

How to Protect Your Boat's Fiberglass Between Details

Is Dawn Dish Soap Good for Boats?

It’s tempting to reach for household detergents like Dawn when washing a boat. However, dish soaps are powerful degreasers intended to cut through kitchen grime. They strip wax and protective coatings from gelcoat, leaving the surface exposed. Professional detailers recommend gentle, pH‑neutral soaps designed for boats because they clean effectively without removing wax or ceramic coatings.

When a client once confessed to using dish soap after a weekend of fishing, we noticed the finish looked dull and chalky. We restored the shine with our Boat Detailing package and explained the importance of dedicated products. Sticking to marine‑approved cleaners preserves your investment and reduces how often you need major detailing.

How Long Will Vinyl Wrap Last on a Boat?

Vinyl wraps are an eye‑catching way to personalize your vessel. With proper care, a marine‑grade wrap typically lasts five to seven years. Sun exposure, water conditions, and maintenance habits influence lifespan. Regular washing with pH‑neutral soap, avoiding abrasives, and applying a UV protectant help keep colors vibrant. Stored under a cover or indoors, a wrap can often exceed its expected lifespan.

Should you notice edges lifting or colors fading, address those issues promptly. Small repairs are easier than full replacements. Our team at Boat Detailing Services can inspect and maintain vinyl wraps as part of a custom care plan.

How to Prevent Gel Coat Damage

Gelcoat is the glossy outer layer that protects fiberglass and gives boats their shine. Preventing damage to this layer involves shielding it from UV exposure, abrasion, and chemical attack. First, wash regularly with a gentle cleaner and dry thoroughly. Second, apply a UV protectant like 303 Aerospace Protectant on exposed surfaces; its powerful UV blockers prevent sun damage and keep the gelcoat supple. Third, keep the boat covered when not in use to minimize exposure to sunlight and environmental pollutants. For a deeper dive into gelcoat protection, check out How to Prevent Gel Coat Damage.

An annual or bi‑annual wax adds an extra shield against water and contaminants. If your boat shows signs of oxidation—when the gelcoat turns chalky—a professional polish can restore the shine. Early intervention is key; once the gelcoat is compromised, repairs become more complicated and expensive.

A Personal Note from Speedy K

As someone who grew up on Lake Erie, I’ve seen what happens when boats are neglected between details. My own first boat was a small runabout that I loved more than my car. I spent weekends fishing and waterskiing, blissfully unaware that sun and salt were slowly degrading its finish. By the third summer, the once‑mirror‑like hull had dulled and the vinyl seats had cracked. It took hours of compounding and re‑upholstery to undo the damage.

That experience inspired me to offer Boat Detailing Services that combine convenience with education. We don’t just polish your boat; we teach you how to protect it between appointments. Whether you choose a basic wash, a complete Boat Detailing package, or our premium ceramic coating, we’ll show you the best maintenance practices. And because every vessel is unique, our plans are flexible—designed for fishing boats, wake boats, cruisers, and personal watercraft alike.

For additional reading on maintaining finishes, check out this detailed guide on maintaining your boat’s finish after ceramic coating. It offers practical steps to keep coatings performing at their best.

Conclusion

Protecting your boat’s fiberglass between professional details doesn’t require an arsenal of products or a lot of time. It’s about adopting consistent habits: gentle washing, applying quick detailers and UV protectants, storing the boat under cover, and inspecting surfaces regularly. When in doubt, lean on professionals who live and breathe marine care. With the right routine, you’ll preserve the fiberglass’s shine, prevent long‑term damage, and enjoy each season on the water with confidence.

How to Protect Your Boat's Fiberglass Between Details

Best Time to Detail Your Boat Before Boating Season Starts

Best Time to Detail Your Boat Before Boating Season Starts

With the days growing longer and the promise of open water on the horizon, boat owners everywhere start planning for another season of adventures. If you want to glide across the lake in a vessel that looks and performs at its best, detailing is one of the most worthwhile preparations you can make. Done at the right time, cleaning and protection not only make your boat shine but also save money by preserving finishes and mechanical components. In this guide, I’ll share when to book your detail, what to avoid, and how the timing ties into broader boating rules and market trends. I’ll also explore the Boat Detailing Services and Boat/Watercraft Detailing options available to fit different needs and budgets.

Understanding Seasonal Boat Detailing

Boats live in harsh environments. Salt or freshwater, UV rays, algae films and road grime all conspire to dull finishes and degrade mechanical systems. The purpose of seasonal detailing is not merely cosmetic; it protects gelcoat and vinyl, keeps corrosion at bay and makes routine cleaning easier. Regular service also helps maintain resale value—clean engines and hulls run more efficiently and look more appealing to potential buyers. By planning work around the seasons, you can maximize the protective benefits of waxes, sealants and coatings and spread out maintenance tasks so they never feel overwhelming.

Why Late Winter to Early Spring Is the Sweet Spot

Most detailers agree that the best time to detail your boat before the boating season starts is late winter through early spring. According to ZV Detailing’s Lake Keowee calendar, detailing before the first launch lets you remove winter grime, reset UV and waterline protection, and allow coatings time to cure. It also helps you beat the spring rush when professional shops quickly fill their schedules. During this service, technicians perform a full exterior wash and decontamination, treat waterline stains and oxidation on gelcoat, deep clean vinyl and carpet, and apply protectants before UV levels climb. If the gelcoat has faded, polishing or correction work can restore gloss, and it’s the perfect time to apply a ceramic coating. From a practical perspective, early detailing means less time scrubbing baked‑on pollen in July and more time enjoying the water.

Benefits of Spring Detailing

Detailing in early spring has several additional perks. Engines that sat idle all winter are inspected, oil and filters replaced, and batteries tested. Electronics and wiring are checked for corrosion or rodent damage. Deck hardware and metal rails get a polish, preventing rust from setting in once the boat is back in the sun. A freshly waxed hull also improves hydrodynamics—a smooth surface reduces drag and can even enhance fuel efficiency. Booking early ensures you have access to the Boat Detailing package of your choice, whether you need a wash‑and‑wax or a full interior makeover. Many owners combine this with Boat Detailing Services for their tow vehicle so that truck and boat look equally sharp leaving the marina.

Early Summer Reset: Keeping Your Boat Fresh Mid‑Season

By early summer the boat has already logged a few hours on the water. Sunscreen residue, spilled drinks and sandy feet leave their mark on upholstery, seams and non‑skid surfaces. A mid‑season detail serves as a reset: deep cleaning high‑touch areas, treating mildew in shaded compartments and refreshing topside polish. For heavily used boats, this appointment can be lighter than spring but it prevents dirt from becoming permanent stains. Trailered boats also benefit from a trailer rinse and wheel cleaning—brake dust and road film accumulate quickly and can cause corrosion. Rental operators often schedule mid‑season detailing to keep their fleets looking inviting and to avoid guest complaints about sticky vinyl or hazy windshields.

Best Time to Detail Your Boat Before Boating Season Starts

Fall Detailing: Preparing for Storage and Preventing Damage

Fall is the other prime window for boat care. As ZV Detailing notes, early fall is the second‑best time to detail because you remove the heaviest summer buildup and set the boat up for storage. A strong fall service focuses on interior cleaning and drying to reduce mildew risk, carpet and upholstery shampooing, thorough exterior washing and waterline treatment, and a fresh layer of protection on gelcoat, metal and plastic. Trailer cleanup ensures brake dust and road film do not sit on wheels all winter. If you missed applying a ceramic coating in spring, cool fall weather can be a good time—just be sure to allow proper cure time before covering the boat. A final rinse and cover keep pests and mold at bay, so come spring your boat is ready for a quick wipe‑down and launch.

What Is the 3 R Rule in Boating?

Understanding basic navigation and safety rules makes every trip safer and more enjoyable. The phrase 3 R rule is commonly used in two contexts. For navigation, it’s a mnemonic for Red Right Returning, meaning you should keep red channel markers on your right (starboard) side when returning from open water. This helps prevent collisions in busy channels and harbors. In a broader safety context, the 3 R rule stands for Recognize, Respect, Respond. Recognize hazards early by scanning for other boats, swimmers, debris and changing weather. Respect laws and other boaters by following navigation rules, wake zones and local ordinances. Respond calmly and decisively when conditions change—slow down, alter course or signal as needed. Incorporating this mindset into your outings reduces risk and ensures everyone on board has a pleasant experience.

What Is the 1/3 Rule in Boating?

Fuel management is critical, especially on longer trips. The 1/3 rule offers a simple guideline: use one‑third of your fuel to reach your destination, one‑third to return and keep one‑third in reserve. This rule accounts for unexpected headwinds, detours, currents or mechanical issues. It’s particularly important on bodies of water with limited refueling options. Keep in mind that factors like rough seas, heavy loads or towing inflatables will increase consumption. Plan your route and monitor your fuel gauge frequently; modern multifunction displays and fuel‑flow sensors make this easier. If you’re chartering a boat or renting, ask the operator about fuel policy and recommended reserves. Following the 1/3 rule not only keeps you from running dry but also reduces stress, allowing you to focus on the scenery instead of the gas gauge.

Best Time to Detail Your Boat Before Boating Season Starts

Are Boat Prices Going Down in 2026?

The state of the boat market in 2026 is a common concern for both buyers and sellers. After the pandemic‑driven boom, retail sales softened in 2024 and 2025. The National Marine Manufacturers Association reported that new powerboat retail unit sales were down roughly 8–10% in 2025. Entering 2026, mixed economic conditions—higher interest rates, inflation and a glut of inventory—are expected to keep unit sales on par or only slightly higher than the previous year. That implies pricing pressure in many segments, particularly for new boats. Meanwhile, used boat inventories have swelled, and experts at National Vehicle describe the 2026 market as shifting from a seller’s market to a buyer’s market, with patient and value‑conscious consumers demanding better bargains. High interest rates and sustained inflation have increased financing costs, making large discretionary purchases less appealing; this build‑up of unsold inventory puts downward pressure on prices. However, the outlook varies by segment: freshwater fishing boats and entry‑level runabouts remain relatively stable, while pontoons and jet boats have seen more significant declines. Technological innovations—such as electric or hybrid propulsion and digital dashboards—are also influencing demand. If you’re considering buying or selling, keep an eye on local market conditions and be prepared to negotiate. Proper detailing and documentation will help your boat stand out and retain value.

What Are Common Boat Detailing Mistakes?

Detailing is as much about process as it is about products. Many boat owners unintentionally shorten the life of their finishes by cutting corners or using the wrong materials. Here are some of the most frequent mistakes identified by detailing experts and how to avoid them:

  1. Using household cleaners – Multi‑purpose cleaners are often too harsh. They strip wax, dry out vinyl, dull gelcoat and corrode metal. Always choose pH‑balanced, marine‑grade products designed for boat surfaces.
  2. Skipping the rinse – Washing without rinsing off salt and dirt first grinds contaminants into the surface and creates micro‑scratches. Rinse thoroughly with fresh water before applying soap.
  3. Detailing in direct sunlight – Sunlight causes soap and water to dry too fast, leaving spots and streaks. Whenever possible, work in the shade or during cooler parts of the day.
  4. Using abrasive pads on gelcoat – Aggressive pads scratch and dull the surface. Use microfiber mitts or soft‑bristle brushes designed for marine finishes.
  5. Waxing over oxidation – Applying wax to a chalky surface locks in dullness and reduces bonding. Remove oxidation with a marine compound or polish before waxing.
  6. Using too much product – Overuse leads to streaks and haze. Apply thin, even layers; quality waxes and sealants go a long way.
  7. Ignoring upholstery and metal – Neglecting vinyl seats, rails and fittings accelerates wear and corrosion. Clean and protect all materials as part of your routine.
  8. Over‑complicating the process – Complex routines are hard to maintain and may lead to neglect. A simple regimen of regular washing, rinsing, sealing and waxing yields better long‑term results.

For more in‑depth guidance, see the article What are common boat detailing mistakes? for tips tailored to your boat type and material.

Selecting the Right Boat Detailing Package

Not all services are created equal. The right Boat Detailing package depends on your boat’s size, material and use case. Entry‑level packages often include a wash, wax and interior wipe‑down, ideal for newer boats that are regularly cleaned. Mid‑level packages add oxidation removal, vinyl conditioning and non‑skid treatment. Premium packages may include compounding, paint correction, stainless steel polishing, teak cleaning and ceramic coatings. When choosing, consider the age and condition of your vessel, how often you use it, and whether you store it indoors or outdoors. If you’re prepping for sale, a comprehensive package can pay for itself by increasing resale value. Many detailers also offer Boat/Watercraft Detailing services on site or via mobile units, making it convenient to get professional results without hauling your boat across town.

Conclusion and Key Takeaways

Detailing isn’t a luxury; it’s an investment in safety, performance and enjoyment. Planning your detail around the seasons—late winter/early spring, early summer and early fall—helps maintain protective coatings and simplifies maintenance. Understanding boating rules like the 3 R (Recognize, Respect, Respond) and 1/3 fuel rule adds safety and confidence to every outing. In the current market, used boat prices are softening while new boat sales remain stable, so well‑maintained boats command better offers. Avoid common mistakes by using proper products, rinsing thoroughly, working out of direct sun and applying wax to properly prepared surfaces. Whether you hire a professional or tackle the job yourself, leveraging Boat Detailing Services and the right Boat Detailing package keeps your vessel looking sharp and ready for adventure.

Best Time to Detail Your Boat Before Boating Season Starts

What are the steps to detailing a boat?

Why Regular Boat Detailing Matters

Boats spend their lives in harsh environments. Salt spray, UV radiation and algae all attack gelcoat and vinyl, causing surfaces to dull and crack. Regular detailing is not just about vanity; it preserves structural integrity, safety and resale value. Consistent cleaning and protective treatments prevent oxidation, corrosion and fading and keep decks slip‑resistant. Well‑maintained boats handle better, burn less fuel and hold their value longer, making Boat/Watercraft Detailing a sensible investment for any owner. Professional packages like Boat Detailing Services bundle exterior washing, hull cleaning and interior sanitizing to ensure every component is protected.

Consistent upkeep also reduces the need for expensive corrective work. Washing after every outing removes salt deposits and grime that etch into gelcoat, while a thorough detail every three to six months keeps oxidation at bay. Because the Columbus climate includes humid summers and cold winters, owners in Ohio benefit from scheduled Boat Detailing in Columbus to prepare for storage in autumn and spring launches.

What are the steps to detailing a boat?

Preparing Your Boat for the Detail

Before diving into polish and wax, set yourself up for success. Start by removing all personal gear, life jackets, coolers and fishing equipment so you have clear access to every surface. Choose a cool, shaded spot; working under direct sun causes soaps and sealants to flash‑dry and leave stubborn streaks. Rinse the boat from top to bottom to knock off loose debris and prevent grit from scratching the finish.

Use the two‑bucket wash method to avoid grinding dirt back into the gelcoat. One bucket holds soapy water and the other holds clean water for rinsing your mitt; switching between them traps abrasive particles in the rinse bucket. After washing, use a clay mitt or clay bar to decontaminate the hull and remove bonded minerals. Dry the boat thoroughly with microfiber towels to prevent water spots, then mask or protect any sensitive electronics or teak before compounding.

Essential Tools and Supplies

A few specialized tools make boat detailing easier and safer. Always use marine‑grade products—household cleaners can strip wax and damage gelcoat. Here are a few essentials derived from professional checklists:

CategoryEquipmentNotes
Washing & DryingpH‑balanced boat soap, soft bristle brushes, chenille microfiber wash mitt, high‑quality microfiber towelsWash from top to bottom and dry completely to avoid water spots.
Spot TreatmentClay mitt/clay bar, dedicated water‑spot removerDecontaminate hull and remove mineral deposits before polishing.
Interior CareVacuum with crevice tool, vinyl cleaner, UV protectantClean seams and under cushions; protect vinyl from cracking.
Protective ProductsMarine‑grade compound, polish and wax/sealantCompound removes oxidation, polish restores gloss, wax creates a barrier.
Safety GearGloves, eye protectionChemicals and flying debris require proper protection.

Having the right tools prevents frustration and ensures that the products you apply bond properly to the surface.

What are the steps to detailing a boat?

What are the steps to detailing a boat?

A thorough detail follows a logical sequence so dirt isn’t re‑deposited on freshly cleaned surfaces. A proven seven‑step method takes a boat from grimy to gleaming:

Step 1: Wash and Decontaminate

Begin by giving the entire boat a deep wash to remove loose dirt, salt and algae. Remove or cover carpets and accessories, then wash from the tower or hardtop down to the hull to prevent streaks. Use a marine‑safe soap and rinse frequently. After washing, use a clay mitt to lift bonded contaminants such as mineral deposits and scum lines. If the boat is severely oxidized, move directly to compounding.

Step 2: Correct the Gel Coat Finish

Once clean, correct the gelcoat by compounding and polishing to remove oxidation, swirls and light scratches. Detailers often use a two‑step process: first apply a coarse compound to eliminate oxidation, then follow with a fine polish to restore depth and shine. Work in small sections and be thorough—skipping areas leaves dull spots that stand out.

Step 3: Apply Paint Protection

After polishing, protect your work with a sealant or wax. A high‑quality polymer sealant shields against UV rays, salt and oxidation for six to twelve months. Wax should be applied in thin, overlapping layers and buffed to a high gloss. This sacrificial layer is the first line of defense against the elements.

Step 4: Deep Clean the Interior

While the hull cures, move inside. Vacuum carpets and storage lockers, then clean vinyl seats and upholstery with a pH‑neutral, marine‑specific cleaner. Avoid household chemicals like bleach or ammonia; they strip oils from vinyl and cause cracking. Dry all cushions and compartments thoroughly to prevent mildew.

Step 5: Correct and Protect Interior Surfaces

Interior surfaces deserve the same corrective treatment as the hull. Lightly polish fiberglass panels and cabinetry to remove fine scratches, then apply a polymer sealant designed for interiors. Conditioning vinyl and leather seats helps maintain suppleness and resists UV damage.

Step 6: Polish Metal and Clean Glass

Chrome railings, cleats and aluminum fixtures catch the eye when they shine. Use a dedicated metal polish to restore luster and remove corrosion. Then, clean both interior and exterior glass with an ammonia‑free cleaner to avoid damaging tint or plastic. Dry with a lint‑free towel to eliminate streaks.

Step 7: Final Inspection and Buff

Finish with a careful walk‑around. Buff away any excess wax or compound residue with a fresh microfiber towel. Inspect for missed spots or streaks, and touch up as needed. A meticulous final check ensures your boat impresses at the dock or on the trailer.

What are the steps to detailing a boat?

What does boat detailing include?

Many owners wonder what they’re paying for in a professional detail. A basic package includes exterior washing, hull cleaning, scum‑line removal and drying. Non‑skid decks are scrubbed, vinyl seats are cleansed and chrome is polished. Professionals then apply wax or a sealant to protect the finish. Interior detailing typically covers vacuuming and shampooing carpets, wiping down cabinets, disinfecting heads and conditioning leather or vinyl. More advanced packages offer oxidation restoration, ceramic coatings and engine compartment cleaning.

Engine and bilge cleaning is sometimes offered as an add‑on. It involves degreasing and wiping engine parts and checking for leaks; this improves appearance and helps spot maintenance issues early. When choosing a package, look closely at what’s included and ask if additional services like barnacle removal or interior sanitation are extra. Customizing services ensures you get the right level of care for your vessel without paying for unnecessary work—something reputable providers like Boat Detailing Services emphasize.

How much does it cost to get a boat detailed?

Prices vary widely depending on boat size, condition and service level. Detailers typically charge per foot because larger boats require more labor and materials. Basic cleaning on small boats starts around $10 per foot, while specialized restoration can reach $125–$200 per foot. For a 25‑foot vessel, a basic exterior cleaning might cost $250–$600, whereas a full interior and exterior restoration could exceed $3,000.

The table below summarizes typical per‑foot rates for different boat sizes:

Boat sizeBasic detail (per foot)Comprehensive detail (per foot)
Small (≤20 ft)$10–$20$20–$30
Medium (20–40 ft)$12–$25$25–$35
Large (≥40 ft)$15–$30$30–$45+

Keep in mind that heavily oxidized surfaces or neglected boats may incur additional costs from $20–$55 per foot for corrective work. Mobile service or travel to inaccessible docks can also add surcharges. To gauge value, compare package contents and check whether interior cleaning, oxidation removal and protective coatings are included. Talking with a professional like those at Boat Detailing Services helps align your budget with your boat’s needs.

Factors That Influence Pricing

Several variables determine the final cost:

  1. Size and condition: Larger boats and heavily oxidized hulls require more time and specialized products.
  2. Type of service: A simple wash includes hull washing, deck scrubbing and light spray wax, while comprehensive packages add buffing, oxidation removal and ceramic coatings.
  3. Location and accessibility: Coastal regions often have competitive pricing; inland areas may be higher due to fewer service providers. Mobile services may charge travel fees.
  4. Add‑ons: Engine cleaning, barnacle removal and bilge degreasing are usually priced separately.

Understanding these factors helps you choose the right Boat/Watercraft Detailing package and avoid unexpected charges.

How long should it take to detail a boat?

Detailing time depends on boat size, condition and the level of service. A small, well‑maintained boat might require three to five hours for a basic wash. Mid‑sized boats needing wash, wax and interior detailing can take a full day. Large boats over 40 feet or vessels requiring oxidation restoration and deep interior cleaning may require two or more days. Weather conditions, access to water and power, and the number of detailers working on the boat also influence timing.

From a do‑it‑yourself perspective, South Shore Detail notes that small boats need four to six hours, while yachts can take up to two days based on condition and service level. Professionals often complete the job more efficiently because they use commercial‑grade polishers and have trained teams. When scheduling a detail, ask for a time estimate so you can plan around your boating schedule.

Maintaining Your Boat Between Details

Regular maintenance between professional details keeps your boat looking its best and reduces long‑term costs. Rinse your boat thoroughly after every outing, especially after saltwater exposure. Wipe down vinyl seats and apply UV protectant to prevent cracking. Keep the bilge area clean and dry to avoid mildew. Inspect your boat regularly for minor oxidation or stains and address them promptly—small issues are easier to fix before they become major restorations.

Frequent waxing or sealing extends protection. South Shore Detail recommends waxing every two to three months and applying a sealant once or twice per season to guard against UV and saltwater damage. Scheduling a full detail every three to six months ensures that the protective layers are refreshed and any developing problems are caught early.

Common Mistakes to Avoid

A few missteps can undo all your hard work. Avoid using car soaps or household cleaners; they strip protective coatings and harm fiberglass. Never wax non‑skid surfaces—it creates dangerous slipperiness. Don’t scrub clear vinyl or isinglass with abrasive brushes or ammonia‑based cleaners because they cause scratching. Mixing cleaning chemicals such as bleach and acids releases toxic fumes and damages surfaces. Skipping preparation—like washing before waxing—traps oxidation under the wax and dulls the finish. Lastly, neglecting small areas like metal fittings accelerates corrosion.

DIY vs. Professional Boat Detailing

Detailing a boat yourself can save money but demands time, labor and specialized equipment. DIY kits cost around $100–$300 and require several hours—sometimes days—to achieve professional‑level results. Without rotary buffers and marine‑specific compounds, the outcome may disappoint. Professional detailers charge between $20 and $45 per foot for comprehensive services, but they complete the job more quickly and use commercial‑grade tools that deliver a deeper shine and longer‑lasting protection.

When selecting a professional, look for transparent pricing, clear per‑foot rates and detailed descriptions of what each package includes. Examine before‑and‑after photos and verify that the detailer is insured. In the Columbus area, Boat Detailing Services offer mobile packages where technicians travel to your dock or driveway. If convenience is important, learn How Does Mobile Boat Detailing Work and compare the added travel fees to the time you save. Investing in professional Boat Detailing in Columbus yields better results and preserves your watercraft’s value over time.

Conclusion

Detailing a boat isn’t just about keeping it shiny—it’s a maintenance practice that safeguards your investment, improves performance and ensures safety. Following a structured process of washing, correcting, protecting and inspecting delivers professional‑grade results. The right tools and products make the job easier, and staying on a regular schedule prevents costly restoration down the road. Whether you choose the DIY route or hire a professional, understanding What are the steps to detailing a boat? empowers you to make smart decisions and enjoy your vessel for years to come. For tailored packages and expert care, check out Boat/Watercraft Detailing or explore Boat Detailing Services in your area.

What are the steps to detailing a boat?

What are common boat detailing mistakes?

Boats are more than just a mode of transport; for many of us they represent freedom, relaxation and significant investment. Keeping a vessel looking and performing its best requires regular maintenance and a clear understanding of what not to do. Too often, boat owners unintentionally harm their watercraft by repeating common detailing mistakes. In my years of working around boats, I have seen firsthand how small missteps can lead to faded gelcoat, cracked upholstery, corroded hardware and even safety hazards. In this guide we’ll explore what are common boat detailing mistakes?, why they matter and how you can avoid them. By the end, you’ll have a roadmap for protecting your boat’s value and appearance without needless frustration.

Understanding what are common boat detailing mistakes?

The phrase “what are common boat detailing mistakes?” may sound like a simple question, yet the answer covers several areas of care. Detailing isn’t just about waxing a hull until it shines—it encompasses cleaning, polishing, protecting and maintaining every component of a boat. When owners cut corners or use the wrong products, they can trap dirt, scratch surfaces, and shorten the life of critical components. Here are the most common culprits:

  • Wrong cleaning products: Household cleaners such as bleach, ammonia or generic detergents can strip protective wax layers, fade gelcoat and damage vinyl. They lack the UV inhibitors and gentle formulations required for marine surfaces.
  • Poor surface preparation: Applying wax or polish before a thorough wash locks in salt, sand and oxidation. Skipping oxidation removal or buffing too aggressively can cause swirl marks, burns and an uneven finish.
  • Neglecting engines and propellers: Many boaters focus on topsides and hulls while forgetting that performance depends on clean, well‑maintained mechanical parts. Dirty oil, clogged filters, nicked propellers and salt buildup can sap fuel efficiency and cause costly repairs.
  • Overlooking the interior: Moist, enclosed spaces encourage mold and mildew. Failing to clean upholstery, carpets and cabins allows stains and odors to set in.
  • Using improper tools: Hard brushes, abrasive pads and ragged towels scratch finishes and trap lint. Microfiber cloths and marine‑grade brushes are worth the investment.

Table: common mistakes and how to avoid them

MistakeWhy it’s a problemPrevention
Using household cleanersStrips wax, damages gelcoat and upholsteryAlways choose marine‑specific cleaners with UV protection
Waxing without washingTraps dirt and salt under the wax, causing scratches and uneven shineThoroughly wash and dry before polishing or waxing
Ignoring engine and propellerReduces performance, fuel efficiency and can cause expensive breakdownsRegularly check fluids, filters and propeller condition
Skipping interior detailingLeads to mold, mildew, stains and odorsVacuum, wipe surfaces and use vinyl cleaners; dry thoroughly
Wrong brushes or clothsScratches finishes, leaves lint and uneven streaksUse soft microfiber towels and marine‑grade brushes
What are common boat detailing mistakes?

Choosing the right cleaning products for your boat

One of the first lessons I learned on the dock is that marine‑specific products matter. What are common boat detailing mistakes? Many owners reach for an old bottle of dish soap or bleach, only to see their hulls dull and vinyl seats crack months later. Boat finishes—particularly gelcoat—require cleaners formulated to handle salt, UV exposure and the delicate balance of protective waxes. Harsh chemicals not only strip away these protections but can also harm the environment. Always read labels and look for products designed for fiberglass, vinyl, teak or stainless steel. Many marine cleaners also include UV inhibitors and protective coatings, providing longer‑lasting shine and protection. If you’re unsure, professional Boat Detailing Services often have access to high‑quality cleaners that the average consumer doesn’t.

An often‑overlooked area is oxidation removal. Fiberglass hulls eventually develop a chalky layer of oxidation that dulls the finish. Using an automotive compound or coarse abrasive can do more harm than good; marine oxidation removers are formulated to gently lift oxidation without gouging the gelcoat. Once removed, follow up with a marine polish and wax to seal and protect the surface. Your boat will not only look better but glide more efficiently through the water.

Surface preparation: wash, wax and polish correctly

Even the best products won’t work if the surface isn’t properly prepared. One of the key points in answering “what are common boat detailing mistakes?” is how boaters rush the washing process. Before any waxing or polishing, rinse the boat with fresh water to remove salt and debris. Use a gentle boat soap with a soft sponge or mitt, working from top to bottom. Pay special attention to non‑skid areas and under rails, where grime collects. After washing, dry the boat completely to prevent water spots.

Waxing and polishing are often treated interchangeably but serve different purposes. Polish removes minor oxidation and light scratches, while wax seals the surface, providing a protective barrier against UV rays, salt and pollution. Always polish before waxing; skipping this step locks oxidation under the wax and results in a dull finish. When buffing, avoid high‑speed rotary tools unless you have experience. Moving too quickly with a rotary buffer is a frequent mistake that can burn gelcoat and create swirl marks. Instead, use dual‑action polishers or apply polish by hand in small sections, buffing to a high gloss before applying wax.

For a deeper restoration, consider How to Restore Faded Gelcoat on a Boat for step‑by‑step guidance. This resource offers detailed instructions for tackling oxidation and returning a chalky hull to its original shine.

What are common boat detailing mistakes?

Engine, propeller and hardware maintenance

Shiny topsides mean little if the mechanical parts of your boat are neglected. What are common boat detailing mistakes? Many boaters forget to inspect the engine, propeller and metal fittings during their detailing routine. Checking engine oil, coolant and filter conditions should be part of every detailing session. Dirty or low fluids stress the engine and reduce performance. Similarly, failing to replace clogged fuel filters can lead to sluggish acceleration or stalling.

Propellers are another easily overlooked component. Nicks, dings and debris lodged in the blades reduce speed and fuel efficiency and can strain the drive train. During detailing, remove the propeller and inspect it for damage or fishing line wrapped around the shaft. Lightly sand out small nicks or replace damaged blades entirely. Metal fittings such as cleats, hinges and railings also need attention; use a metal polish to remove corrosion and apply a protective coating to prevent pitting.

If you’re unsure how to maintain mechanical components, professional Boat/Watercraft Detailing services often include engine bay cleaning and propeller inspections. They have the tools and expertise to spot issues early and keep your boat running smoothly.

Interior care and correct tools

The cabin and cockpit deserve as much care as the hull. Boat interiors are prone to moisture and humidity, which can lead to mold, mildew and unpleasant odors if not addressed. Vacuum carpets and upholstery regularly, paying attention to hidden corners and storage compartments. Use marine‑grade vinyl cleaners and conditioners on seats and cushions to protect against UV damage and cracking.

Another common detailing mistake is using the wrong tools. Hard bristle brushes and abrasive pads might seem effective, but they leave scratches and swirl marks on fiberglass and acrylic windows. Opt for soft microfiber cloths, non‑abrasive brushes and dedicated marine sponges. These tools gently lift dirt without harming surfaces. When drying, use a chamois or microfiber towel rather than household towels that shed lint.

For hard‑to‑reach areas, a small detailing brush or toothbrush can dislodge grime around seams and fittings. After cleaning, ventilate the interior to allow moisture to evaporate completely. Neglecting this step traps moisture and encourages mold growth. Professional Boat Detailing Services often include interior detailing packages that ensure every nook is cleaned and protected.

What is the average cost per foot to detail a boat?

Cost is a common consideration when scheduling a detail, and the price can vary widely based on boat size, condition and service level. According to industry estimates, basic exterior washing and topside cleaning can start as low as $2–$4 per foot for a small craft. Premium detailing packages—which might include polishing, wax application, mildew removal and interior cleaning—typically range from $16–$20 per linear foot. For larger vessels over forty feet, expect rates between $10 and $125 per foot depending on the extent of oxidation removal and other variables.

Some providers, like Cloud 9 Tint Studio and Auto Spa, offer tiered packages such as an Opening Weekend package starting at $16 per foot and a Captains Call package from $20 per foot, with higher rates for boats over 27 feet. Variables influencing cost include the condition of the gelcoat, presence of stains, type of protective coatings used and whether engine compartments or mechanical areas are included. Remember that package pricing often bases cost solely on length, but the boat’s condition and required labor may significantly affect the final quote. Regular maintenance can lower costs by preventing heavy oxidation and reducing labor hours.

What are the biggest boat party mistakes?

Hosting a party on the water can be a highlight of boating life, yet many hosts repeat errors that dampen the fun and compromise safety. The biggest mistakes include:

  • Choosing the wrong vessel: Selecting a boat that doesn’t match your party’s vibe—whether a laid‑back cruise or dance‑ready deck—can disappoint guests. Consider size, layout and amenities like swim platforms or sound systems before booking.
  • Overcrowding: Every boat has a maximum passenger capacity. Exceeding it not only violates safety regulations but also makes guests uncomfortable. Confirm RSVPs in advance and, if necessary, charter a larger boat.
  • Ignoring weather and route planning: Weather is unpredictable. Failing to check the forecast or discuss route options with your captain may leave your party battling high winds or rough seas.
  • Neglecting amenities: Not verifying whether your charter includes restrooms, kitchen facilities or ice can lead to last‑minute stress. Always confirm what’s included and bring necessary supplies like cups and napkins.
  • Booking late: Popular charter boats book up quickly, especially around holidays or weekends. Procrastination may mean limited choices or higher costs. Reserve weeks in advance to secure the right vessel.
  • Ignoring safety briefings: When excitement is high, it’s easy to tune out the captain’s safety instructions. Failing to listen can lead to accidents, fines or trip cancellations. Encourage your guests to pay attention and follow all onboard rules.
  • Overindulgence in alcohol: Excessive drinking increases the risk of accidents and worsens seasickness. Provide food, plenty of water and designate a sober buddy for added safety.

By planning ahead, respecting capacity limits and listening to crew instructions, your boat party will be memorable for all the right reasons. If you’re not comfortable managing the details yourself, professional charter companies can handle logistics and safety while you focus on enjoying the event.

Can you write off boat expenses?

Many boat owners wonder whether they can offset ownership costs through tax deductions. The answer depends on how the boat is used and the strict documentation requirements set by the IRS. Here are the main scenarios:

Boat as a second home: If your boat has sleeping quarters, a galley and a head (bathroom), you may deduct the interest on a boat loan in the same way you would for a second home. You must itemize deductions and have the lender issue a Form 1098. The deduction applies only to interest, not to general expenses.

Boat used for business or charter: If you conduct legitimate business aboard—such as client meetings or charter operations—you may deduct a portion of related expenses such as fuel, dockage, maintenance and depreciation. Documentation is critical; you must record the date, location, purpose and attendees for each outing. Only the percentage of time used for business is deductible. As of July 2025, legislation reinstated 100 percent bonus depreciation for qualifying business purchases of yachts. This allows businesses to write off the entire cost of a vessel in the first year, provided the boat is placed in service after January 19 2025 and used primarily for business. Section 179 deductions were also increased, enabling businesses to deduct up to $2.5 million for tangible equipment.

Charitable donation: Donating your boat to a qualified non‑profit may allow you to claim a deduction equal to its fair market value or the amount for which the charity sells it. An appraisal and documentation through Form 1098‑C are necessary.

Transportation or commuting: If you use your boat for business commuting more than half the time, you may be able to deduct fuel, insurance, repairs and dock fees. Entertainment or client use during these trips can invalidate the deduction.

It’s important to note that personal recreation is never deductible. Before pursuing any tax strategy, consult a certified public accountant or maritime tax specialist. Misreporting boat expenses can trigger audits and penalties.

Why invest in professional boat detailing services?

With all these details, some boat owners might ask: why not leave it to the pros? Professional Boat Detailing Services and Boat Detailing package providers bring experience, specialized tools and commercial‑grade products to the table. They understand how to handle delicate finishes, safely remove oxidation and protect against UV damage. Many services offer mobile detailing, allowing them to work at your dock or marina. They can also combine exterior and interior cleaning with engine and propeller maintenance—saving you time and ensuring nothing is overlooked.

Professional detailers can tailor packages to your boat’s size, condition and budget. For instance, a simple wash and wax might suffice for a well‑maintained craft, while a heavily oxidized hull could require polishing, gelcoat restoration and a ceramic coating. By investing in periodic professional detailing, you preserve resale value, improve performance and gain peace of mind. Plus, you avoid the risk of damaging your boat with the wrong product or technique.

Final thoughts: protect your investment

Owning a boat is both a privilege and a responsibility. By understanding what are common boat detailing mistakes?, you can avoid unnecessary damage and keep your vessel looking and running beautifully. Use marine‑specific cleaners, prepare surfaces carefully, maintain mechanical components and invest in quality tools. Don’t forget the interior and never underestimate the importance of safety—whether detailing or hosting a party. When in doubt, rely on professional Boat Detailing Services to guide you. With the right approach, your boat will remain a source of pride and enjoyment for years to come.

What are common boat detailing mistakes?

Is it better to polish or wax a boat?

Maintaining a boat is both a joy and a responsibility. Over the years I’ve learned that caring for the hull is more than just keeping it clean—it influences how the vessel moves through the water, how long it lasts and even how proud you feel when pulling up to the dock. The debate often comes down to one question: Is it better to polish or wax a boat? The truth is that polishing and waxing are different steps in a complete care routine. Both are necessary if you want your boat to look its best and perform efficiently. In this post we’ll break down the differences, explain when each process matters, and show you how a thoughtful maintenance plan keeps your boat shining season after season.

Understanding Why Hull Maintenance Matters

Owning a boat is an investment in leisure, freedom and adventure. Proper hull maintenance protects that investment by preventing wear and tear. A clean hull glides more smoothly through the water, which means less drag, better fuel efficiency and improved handling. It also helps prevent common issues like oxidation, fading and staining, which can lead to costly repairs if neglected. Marine environments expose fiberglass or aluminum surfaces to salt, sun and debris, so regular care shields them from corrosion and damage. A well‑maintained boat also retains its resale value, making routine maintenance both practical and economical.

Beyond performance and value, there’s pride involved. Pulling up in a craft with a gleaming, mirror‑like hull is satisfying. It tells other boaters you take care of your vessel. More importantly, it means you’re looking after the protective gel‑coat or paint that keeps the hull watertight. An oxidized, chalky surface isn’t just unattractive; it can be a sign that the underlying gel coat is wearing thin. Proper care—including polishing, waxing and periodic cleaning—keeps the hull strong and beautiful.

Polishing: The Restorative Process

Polishing is essentially restoration. It uses mild abrasives to remove oxidation, stains and light scratches from a boat’s gel coat or paint. When the hull looks dull or feels rough, polishing levels the surface and brings back a rich, even color. It also prepares the surface so wax can bond properly. Without this restorative step, wax might seal in dirt or imperfections instead of protecting a smooth surface.

There are different products and tools for polishing. Liquids work well for light oxidation and can be applied by hand or with an orbital buffer. Paste polishes tackle deeper scratches and require more elbow grease. Buffers—either rotary or orbital—can speed up the job and give an even finish, while microfiber or foam pads help reach intricate areas. Polishing is usually needed once or twice a year depending on how frequently the boat is used and the severity of its exposure. Boats that spend most of their time in saltwater or intense sunlight may benefit from more frequent polishing, while those stored indoors or used primarily in freshwater may only require it annually.

Benefits of Polishing

  • Removes oxidation and stains: A chalky, dull appearance is a sign of oxidation. Polishing cuts through that layer to reveal the original color underneath
  • Levels scratches: Light scratches and scuffs often penetrate only the surface. Polishing smooths these imperfections so the hull feels and looks like new.
  • Improves hydrodynamics: A smooth surface reduces drag, helping the boat move more efficiently. It can even contribute to improved fuel economy.
  • Prepares for waxing: Polishing creates a clean, receptive surface that allows wax to adhere properly.
Is it better to polish or wax a boat?

Waxing: The Protective Shield

While polishing restores, waxing protects. Wax creates a sacrificial barrier between the hull and the elements. It shields the surface from UV rays, saltwater, pollutants and minor abrasions. Waxing also enhances the shine produced by polishing; it makes water bead up and roll off, helping dirt and grime wash away more easily. Without wax, the cleaned surface is exposed again to the harsh marine environment and will oxidize more quickly.

Different waxes exist for different needs. Carnauba wax provides a deep, glossy finish but may need reapplying more often. Synthetic waxes offer long‑lasting protection, though they might not deliver the same level of shine. Cleaner waxes combine mild abrasives and wax for quick touch‑ups, while specialty marine waxes include UV inhibitors and corrosion protection. The frequency of waxing depends on conditions: boats in saltwater or intense sun might need waxing every three to six months, whereas those in milder environments can go longer.

Benefits of Waxing

  • UV protection: Wax blocks ultraviolet rays that can cause fading and oxidation, keeping the hull vibrant longer.
  • Water repellency: A hydrophobic surface makes water bead up and reduces surface tension, which can improve fuel efficiency and make cleaning easier.
  • Anti‑corrosion: A wax layer protects metal fittings and fasteners on the hull from salt‑induced corrosion.
  • Scratch resistance: Wax acts as a sacrificial barrier against minor abrasions and scuffs.
  • Enhanced appearance: Beyond protection, wax amplifies the gloss created by polishing, delivering a showroom finish.

Should I wax or polish my boat?

This is a common question among new boat owners, and the answer depends on the hull’s condition. If the boat’s surface is dull, chalky or has visible stains and scratches, polishing should come first. Polishing removes imperfections and restores the original luster. After polishing, apply wax to seal the restored finish and protect it from future damage.

If the hull looks good but water no longer beads on the surface, that’s a sign the wax has worn off. In that case, a fresh coat of wax alone may suffice. For newer boats that are kept under cover and washed frequently, a high‑quality wax might be all that’s needed for a season or two. However, most boaters will find that a combination of both processes yields the best results: polish when necessary to correct surface issues, then wax to maintain the finish.

How often should a boat be waxed?

The frequency of waxing depends on how often and where you use your boat. As a general guideline, waxing every three to six months is ideal for boats that see regular use or are exposed to saltwater and strong sunlight. Boats stored indoors or used less frequently can be waxed less often, but should still receive a protective coat at least once a year to prevent oxidation. Seasonal waxing, such as at the start of the boating season, is a good practice to ensure protection when the boat is in frequent use. After a heavy polishing session, follow up with wax right away to lock in the restored shine.

Can you wax without polishing?

In some cases you can wax without polishing, but it depends on the surface. Waxing alone is appropriate when the hull’s finish is already smooth, clean and free of oxidation. For instance, if you’ve kept up with maintenance and your boat’s gel coat still has a consistent gloss, adding a fresh layer of wax renews its protection and appearance. However, wax won’t hide scratches or remove stains; applying it over imperfections simply seals them in place. If you see chalkiness, stains or scuffs, it’s worth taking the extra time to polish first. Skipping polishing on a damaged surface will only accelerate wear and reduce the effectiveness of the wax.

What comes first, wax or polish?

Always polish before you wax. Polishing restores the surface by removing oxidation, stains and minor scratches. Once the surface is smooth and glossy, wax seals it and provides long‑term protection. Applying wax first would trap dirt and imperfections under a protective layer, making it harder to correct later. Think of polishing as preparation: it creates a base layer that the wax adheres to. When done in this order, the two processes work together to extend the life of the gel coat or paint.

Choosing the Right Products and Services

Not all polishes and waxes are created equal. Marine‑grade products are specifically formulated for fiberglass and aluminum hulls and often contain UV inhibitors and anti‑corrosive agents. When shopping for products, consider the material of your hull, the water conditions you navigate and how much time you want to spend applying them. For instance, boats in saltwater benefit from synthetic waxes that last longer, while freshwater boats might do well with natural carnauba for maximum shine.

If you don’t have time to do it yourself, professional detailing can be a wise investment. Companies offering Boat Detailing Services know how to assess your hull’s condition and choose the right products. They handle everything from washing and polishing to waxing and specialized treatments. When you opt for a Boat Detailing package, you’re paying for expertise and efficiency, which means more time on the water and less time in the driveway. Whether you call it Boat/Watercraft Detailing or hull maintenance, a professional service can preserve your boat’s value and appearance.

Simple Comparison Table

AspectPolishingWaxing
PurposeRestore surface, remove oxidation and scratchesProvide protective barrier against UV, salt and wear
FrequencyOnce or twice per yearEvery 3–6 months or as needed
ToolsAbrasive compounds, buffers, polishing padsSoft cloths or foam applicators, wax products
OutcomeSmooth, glossy base ready for protectionEnhanced shine, water repellence and UV defense

Combining Polishing and Waxing: A Two‑Step Approach

The most effective hull maintenance routine combines both processes. Start by washing the boat thoroughly to remove salt, dirt and debris. Once dry, polish to correct imperfections and restore the gel coat’s luster. Immediately follow polishing with waxing to seal the surface and provide long‑term protection. This two‑step approach ensures you’re not just covering up problems but fixing them and preventing new ones from developing.

There’s also a practical side to combining these tasks. Doing them together saves time in the long run because a freshly polished surface allows the wax to bond more effectively, which extends its lifespan. Regularly repeating this cycle reduces the need for more aggressive compounding or repair down the road.

Tips for Preventing Gel Coat Damage

Even with diligent polishing and waxing, gel coat damage can occur if the hull is exposed to harsh conditions without additional care. Proper storage—such as using a cover or storing the boat indoors—helps protect against UV degradation and environmental pollutants. Rinsing your boat after each outing removes salt and contaminants that could dull the finish. For a more comprehensive overview of preventive measures, take a look at the repair guide on How to Prevent Gel Coat Damage. It covers cleaning methods, products and techniques that complement polishing and waxing routines.

Final Thoughts: Is it better to polish or wax a boat?

As you’ve seen, the question Is it better to polish or wax a boat? doesn’t have a single answer because the two processes serve different purposes. Polishing is restorative; waxing is protective. A balanced maintenance plan uses both to keep your boat looking sharp and performing efficiently. The sequence and frequency depend on your boat’s condition, how often you use it and the environment in which you sail. When in doubt, err on the side of prevention: polish when you notice dullness or scratches, wax regularly to maintain the finish, and seek professional help if you’d rather spend your weekends cruising than compounding.

Maintaining a boat may seem labor‑intensive, but it’s part of the joy of ownership. With the right tools, products and perhaps some professional Boat Detailing Services, you can preserve your investment, improve performance and take pride in a vessel that gleams under the sun. That peace of mind is worth every minute spent rubbing and buffing.

Is it better to polish or wax a boat?