...

How Do You Remove Black Streaks From an RV Without Damaging the Finish?

To remove black streaks from an RV without damaging the finish, start with the least aggressive method possible: rinse away loose debris, use a cleaner made for RV or automotive finishes, work in small sections, and wipe with a soft microfiber towel. Avoid harsh degreasers, abrasive pads, strong acids, and aggressive scrubbing that can damage gel coat, paint, graphics, or protective sealants.

Black streaks are frustrating because they can make an otherwise clean RV look neglected almost overnight. More importantly, RV Black Streak Removal is not simply about finding the strongest chemical on the shelf. The goal is getting the contamination off while leaving the finish underneath intact.

At Speedy K’s, that distinction matters. Kevin’s detailing experience began around boats and eventually expanded into RVs, vehicles, aircraft, and other specialty surfaces. Over the years, much of that education came from studying how gel coats, paint systems, plastics, trims, and other materials were actually manufactured rather than assuming every surface could be cleaned the same way.

How Do You Remove Black Streaks From an RV Without Damaging the Finish?

Start by rinsing the RV from the top down. This removes loose dirt that could otherwise become abrasive when you begin wiping the surface.

Next, apply a cleaner that specifically lists compatibility with the surface you are working on. Fiberglass, gel coat, painted aluminum, vinyl graphics, plastic trim, and rubber components can react differently to the same product.

A basic process looks like this:

  1. Park the RV in the shade and allow the exterior to cool.
  2. Rinse the roof and sidewalls thoroughly.
  3. Test your cleaner on a small, inconspicuous area.
  4. Apply it to one manageable section at a time.
  5. Allow only the recommended dwell time.
  6. Wipe gently with microfiber or a soft wash mitt.
  7. Rinse completely before the product dries.
  8. Reapply wax or sealant if the cleaner has reduced the existing protection.

Do not assume harder scrubbing equals better cleaning. Often, it simply means more friction against a delicate finish.

That is one reason professional RV Detailing starts with identifying the material and its condition before choosing a process.

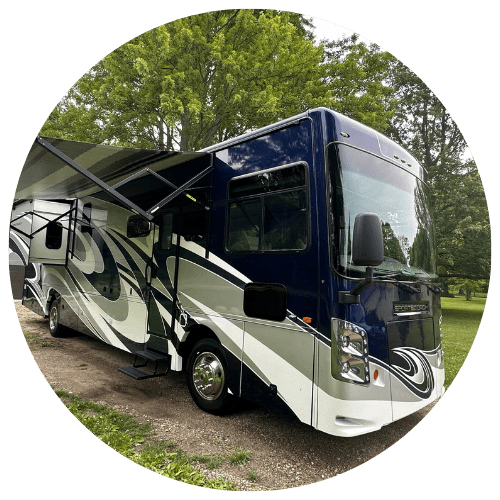
Silver and brown Gulf Stream Class C motorhome parked outdoors.

Why Do RVs Get Black Streaks?

Most RV black streaks come from dirty runoff traveling down the exterior.

Dust, pollen, road grime, oxidation, airborne contaminants, and debris collect on the roof and around seams, gutters, vents, awnings, trim, and other horizontal areas. Rain or rinse water picks up those contaminants and carries them down the sidewall. When the water evaporates, dark residue remains behind.

Older or poorly protected finishes can make the problem worse. A smooth, maintained surface generally releases contamination more easily than an oxidized or porous one.

Kevin has seen this issue become especially challenging on fifth wheels and travel trailers with relatively thin gel coat or single-stage painted surfaces. Once a finish is heavily oxidized or physically deteriorated, cleaning alone cannot make damaged material new again. There is a big difference between removing contamination and repairing a failing finish.

How to Get Rid of Black Streaks?

The biggest mistake is letting black streaks bake in for months and then attacking them with the strongest cleaner available.

Fresh streaks are usually much easier to remove. If you notice them after rain, storage, or a long road trip, address them before repeated sunlight and heat make the residue more stubborn.

For routine RV Exterior Cleaning, start with water and a mild RV-safe wash. Move to a dedicated black-streak cleaner only where needed.

This is also a good time to clean the roof. Removing streaks from the sidewalls while leaving a heavily contaminated roof untouched means the next rainfall can simply send more grime down the same areas.

The U.S. Environmental Protection Agency also recommends using soap sparingly when washing vehicles and directing wash water away from storm drains when possible. Its vehicle-washing guidance recommends phosphate-free products and allowing wash water to filter through grass or gravel rather than running directly into waterways.

What Is the Best Homemade Black Streak Remover for an RV?

There is no homemade black streak remover that is automatically safe for every RV.

For light streaking, the safest DIY starting point is usually warm water with a small amount of mild, finish-compatible RV or automotive wash soap. That sounds less exciting than the internet recipes involving vinegar, dish detergent, baking soda, and household degreasers, but gentler is usually better when you are dealing with an expensive exterior.

Do not automatically reach for kitchen cleaners because they happen to remove grease well. A product that performs beautifully on cookware was not necessarily designed around waxed fiberglass, RV decals, gel coat, or automotive paint.

Kevin’s approach has always been to understand the material first. Early in his career, he studied manufacturer information, practiced restoration techniques on panels and salvage equipment, and learned through repeated testing rather than grabbing whatever cleaner happened to be available at a store.

The same logic applies at home.
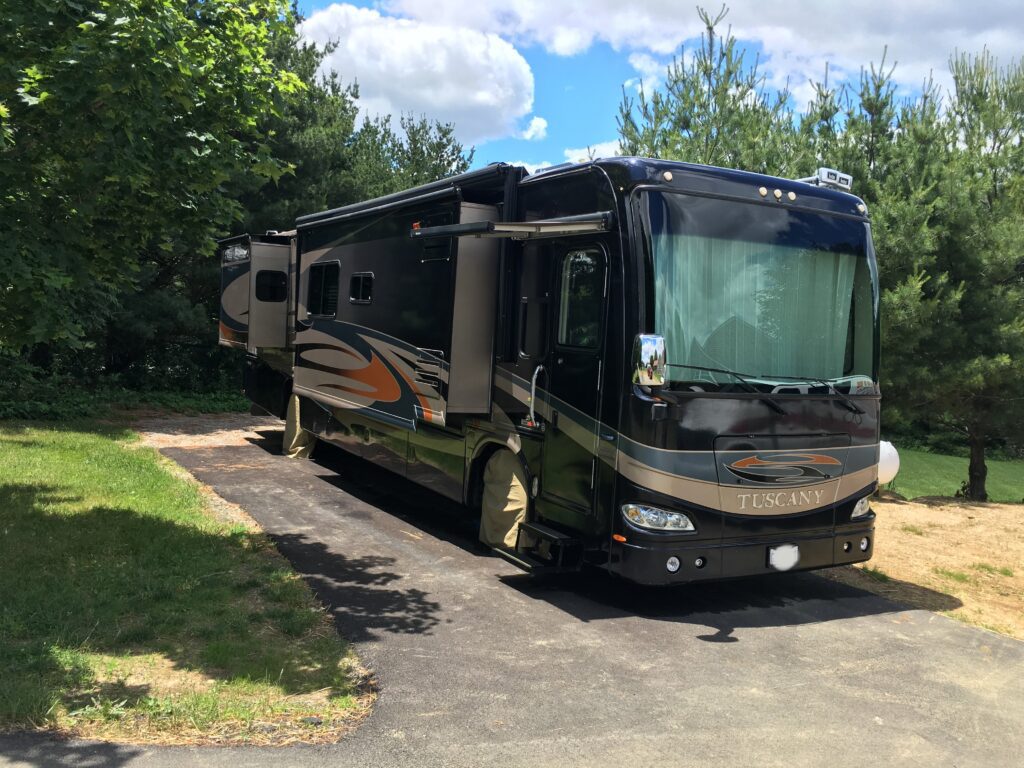
Luxury Tuscany motorcoach parked outdoors before RV detailing and storage preparation

Will Vinegar Remove Black Streaks From RV?

Vinegar may loosen some mineral deposits and grime, but that does not make it the best routine choice for an RV exterior.

Its acidity is exactly why homeowners like it for certain cleaning jobs. That same characteristic can make it a questionable choice around waxes, sealants, decals, metals, and finishes when the concentration and surface compatibility are unknown.

If you are considering vinegar, check the RV or component manufacturer’s cleaning recommendations first and test an extremely small area. Never assume a stronger vinegar mixture will work better.

The safer approach is usually a product formulated for the type of exterior you actually have.

The same caution applies to dishwashing detergent. Speedy K’s covers that topic in more detail in Can I use Dawn dish soap on my RV?.

Does Camco Black Streak Remover Work?

Camco sells a Pro-Strength Black Streak Remover specifically marketed for RV maintenance, so it is certainly an option owners may encounter.

The more important question is whether a particular cleaner is appropriate for your specific RV. Even products made for RV use should be tested before treating a large painted, fiberglass, or graphic-covered surface.

That is especially important because RVs age differently. One coach may have healthy gel coat and newer graphics, while another may already have fading, oxidation, cracking, weak paint, or previous chemical damage.

Use the manufacturer’s directions, respect the recommended dwell time, and rinse thoroughly. Do not let a black-streak product dry on the surface while you work around the entire coach.

If one application does not remove everything, a second controlled treatment is generally smarter than aggressive scrubbing.

What Is the Best Cleaner for an RV Exterior?

The best cleaner is one matched to the material, contamination, and existing protection on the RV.

For routine washing, look for a mild cleaner specifically intended for RV, automotive, fiberglass, gel coat, or painted surfaces. Manufacturers of fiberglass RV components commonly recommend mild detergent while warning against abrasive products, highly alkaline cleaners, and ammonia-containing formulas.

That guidance lines up closely with what Kevin has learned through decades of detailing work. The correct product matters, but the system matters too.

A quality cleaner paired with dirty brushes, improper dilution, excessive pressure, or poor technique can still leave damage.

For targeted black streaks, a dedicated product such as a black-streak remover from an established automotive, marine, or RV-care manufacturer may be appropriate. Companies including 3M and Star brite also offer formulas designed specifically for dark runoff stains on fiberglass, painted surfaces, metal, or similar materials.

Always verify the label against your RV rather than assuming “RV cleaner” means safe everywhere.

Protecting the Finish After RV Black Streak Removal

Cleaning is only half of the job.

Wax, sealant, or another manufacturer-approved protective treatment can help reduce how strongly future contamination bonds to the surface. Protection also makes routine maintenance easier because dirt is sitting on top of a sacrificial layer instead of directly against oxidized gel coat or paint.

Kevin compares proper detailing maintenance to other forms of routine upkeep. There is no legitimate coating that means an RV never needs maintenance again. Protection helps, but it does not eliminate washing, inspection, or periodic reapplication.

That is also why Speedy K’s emphasizes manufacturer-backed maintenance rather than miracle products.

If the finish has already become chalky, dull, or severely oxidized, applying stronger cleaner is usually not the answer. The exterior may need polishing, correction, or restoration before new protection is applied.

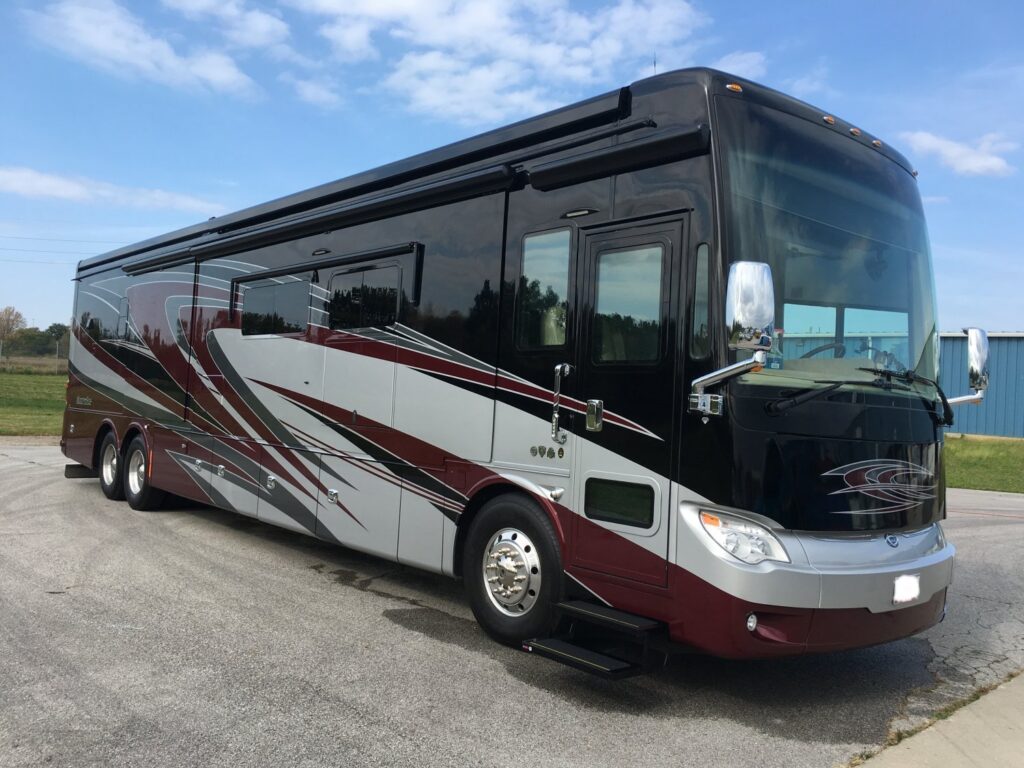
Close-up of motorhome exterior showing RV side panels and graphics

When Does Mobile RV Detailing Make More Sense?

DIY cleaning makes sense for fresh dirt and light streaking. There comes a point, however, where experimentation becomes riskier than hiring someone familiar with the materials.

Consider professional Mobile RV Detailing when black streaks are heavily embedded, the exterior is oxidized, graphics are fading, the finish feels rough, or previous products have already caused discoloration.

Professionals can also distinguish between something that needs cleaning and something that needs correction.

That distinction is important. Kevin regularly encounters owners who expect a deteriorated fifth-wheel or travel-trailer finish to become brand new through cleaning alone. Sometimes the coating itself has already broken down. At that point, the goal becomes safely improving what is there instead of promising an unrealistic result.

Professional RV Black Streak Removal can also address the bigger maintenance picture, including the roof, trim, plastics, graphics, and protective coating rather than treating one visible streak at a time.

Prevention Is Easier Than Repeated Heavy Cleaning

The easiest black streak to remove is the one that never gets heavily established.

Keep the roof clean. Wash the RV regularly during travel season. Remove road grime and runoff before it bakes into the finish, and maintain wax or sealant according to the product and manufacturer recommendations.

Be cautious with automatic washes and harsh cleaning systems too. Kevin has repaired finishes after aggressive wash processes, and he recommends maintaining specialty vehicles using techniques appropriate for their surfaces rather than treating every exterior like an ordinary passenger car.

Black streaks will probably return eventually. RVs live outside, travel highways, sit under trees, collect pollen, and get exposed to rain.

The answer is not stronger chemicals every time. It is consistent maintenance, appropriate products, and knowing when a stain has become a finish-restoration issue instead of a simple cleaning job.
Summer Road Trip Over? What an RV Detail Should Address Before Storage

If your summer road trip is over, an RV detail before storage should do more than make the coach look clean. It should remove road film and bugs, protect exposed finishes, clean moisture- and odor-prone interior areas, inspect vulnerable exterior surfaces, and leave the RV ready to sit without carrying an entire season’s grime into storage.

That is the purpose behind Summer Road Trip Over? What an RV Detail Should Address Before Storage. A proper end-of-season detail is part appearance, part maintenance, and part prevention. The goal is to put the RV away in better condition than it was when the final trip ended.

Summer Road Trip Over? What an RV Detail Should Address Before Storage

Think about what an RV collects on the road: bug residue across the front cap, dust along seals, road film on lower panels, dirt in storage bays, spills around the kitchen, and sand tracked through the living area. None of those problems becomes easier after the RV sits for months.

Professional RV Detailing should look at the RV as a whole rather than treating it like an oversized car. Body materials, decals, roof components, seals, plastics, fiberglass, gel coat, and interior surfaces all require different judgment.

That distinction matters to Kevin at Speedy K’s. He started working around boats as a teenager and spent years learning how finishes were manufactured, how gel coats behaved, and which products manufacturers recommended. That technical mindset carries into RVs, especially fifth wheels and travel trailers with multiple exterior materials.

What to do before putting RV in storage?

Start with a complete cleanout. Remove food, trash, damp towels, toiletries that can leak, pet items, and anything else that can attract pests or create odors. Empty cabinets enough to see whether crumbs, moisture, or spills have been hiding in corners.

Next, clean the RV thoroughly before closing it up. The exterior should be washed, dried, and inspected. Inside, floors, upholstery, counters, bathrooms, appliances, vents, and frequently touched surfaces should all be addressed.

Detailing is only part of storage preparation. Plumbing, batteries, propane, tires, and winterization requirements vary by RV and storage conditions, so follow the owner’s manual and manufacturer recommendations. Winnebago’s travel trailer maintenance guidance is a useful example of why cleaning and inspection should go hand in hand.

Clean luxury RV interior prepared for storage after summer road trips

What are the steps to include in an RV detailing checklist?

A useful RV detailing checklist should move from the dirty exterior areas to more delicate finishing work, then continue inside. That reduces the chance of contaminating cleaned areas again and gives the detailer time to notice problems while working.

Exterior checklist

Clean the roof and upper surfaces as appropriate for the RV. Wash the front cap, sidewalls, rear, awnings, wheels, windows, mirrors, trim, and accessible storage compartments. Bug residue and road grime deserve extra attention because they can become stubborn after sitting.

Then inspect the finish. Kevin notes that some fifth wheels and travel trailers may have limited layers of gel coat or single-stage paint on certain surfaces. Once a finish has seriously failed, a detailer cannot simply buff it back to new. Catching oxidation or neglected protection earlier gives you more options.

Interior checklist

Vacuum floors, seating, corners, vents, and storage areas. Clean hard surfaces, kitchen areas, bathrooms, glass, and upholstery with products appropriate for each material. The goal is to leave surfaces clean and dry before the RV is closed up.

Why exterior protection matters before storage

Cleaning removes contamination. Protection helps the cleaned surface handle what comes next.

Depending on the RV’s exterior and condition, that may mean an appropriate wax, sealant, or other manufacturer-compatible treatment. Kevin’s approach has never been to grab one product off a store shelf and assume it works everywhere. His team has spent years testing processes, training on different finishes, and matching products to the material being treated.

That philosophy separates professional Detailing Services for RVs from a basic vehicle wash. As Speedy K’s explains in RV Detailing vs. Car Detailing, an RV brings different materials, surface areas, access points, and maintenance concerns into the job.

Do not ignore the roof, seals, trim, and graphics

The glossy sidewalls get attention, but important areas are often higher up or tucked around edges. While cleaning, look closely around roof components, windows, doors, exterior seams, vents, trim, and seals for obvious cracking, peeling, deterioration, or staining.

This is not about asking a detailer to diagnose every structural problem. Cleaning simply gives you an opportunity to see areas normally covered in dirt. If something looks questionable, you can have it evaluated before storage.

Graphics and plastic trim also need appropriate treatment. Kevin says one reason Speedy K’s built strong word-of-mouth business is its experience working with plastics, trims, and graphics instead of treating every exterior surface the same.

Close-up of motorhome exterior showing RV side panels and graphics

How to store your RV in the summer?

Summer storage brings heat, UV exposure, storms, humidity, and prolonged sun. Those conditions can be hard on an RV when it sits in one place for weeks.

If possible, choose a storage environment that reduces unnecessary exposure while following the RV manufacturer’s recommendations. Before parking it, make sure the exterior and interior are clean and dry, food is removed, and anything that could hold moisture has been addressed.

Good RV Storage Preparation also means thinking beyond appearance. Check tire condition and pressure according to the RV and tire manufacturer, confirm storage procedures for the battery and plumbing systems, and secure exterior compartments. A beautiful finish does not replace mechanical storage steps.

How to arrange the under storage of RV?

Under-storage and pass-through compartments often become the RV version of a garage junk drawer. Hoses, cords, leveling equipment, chairs, tools, cleaners, and damp outdoor gear can all get pushed inside after a long trip.

Empty those compartments before storage whenever practical. Vacuum or wipe out dirt, let damp areas dry, and check for spilled liquids or signs that water entered during travel. Then group equipment by use so it is easier to find next time.

Use sturdy bins for loose items, but avoid sealing damp gear inside them. Keep chemicals upright and secured, and do not let heavy objects shift against doors, plumbing, wiring, or delicate components.

Why mobile RV detailing makes sense after a long trip

At the end of a road trip, many owners do not want to drive a large motorhome, coach, fifth wheel, or travel trailer somewhere else for cleaning. Mobile RV Detailing lets the RV be serviced where it is parked when the location and conditions are suitable.

There is another advantage: the RV can go from its final-trip condition directly into a storage-ready condition without weeks of grime sitting on the exterior. That matters with bugs, road film, dust, and other contamination.

Kevin also points out that speed does not necessarily mean rushed work. After decades in detailing, his team has developed specific tools, products, and systems that make the process more efficient. The difference is having a repeatable process instead of simply working faster.

The best storage detail is really a maintenance reset

Kevin often compares vehicle protection to going to the dentist. A treatment does not mean you never maintain your teeth again, and no wax, sealant, or coating means an RV can be ignored indefinitely. Maintenance still matters.

That is a useful way to think about an end-of-summer detail. You are cleaning away one season, protecting the surfaces that need it, identifying visible concerns, and creating a better starting point for storage.

Kevin’s biggest advice to owners is simple: follow manufacturer guidance and keep up with maintenance. After decades of training, testing, and correcting neglected finishes, he has seen what happens when owners wait until damage is severe. A careful post-trip detail cannot prevent every repair, but it can help you put the RV away clean, protected, organized, and ready for the next season.

Schedule your RV detail before the grime settles in

If your summer travel is finished, do not think of detailing as the final cosmetic step. Think of it as the transition between travel season and storage season.

A professional RV detail can remove the evidence of highway miles, address areas owners tend to miss, and help protect the surfaces you have invested in. Take care of it before the RV sits, and the next round of preparation becomes much easier.

Meta description: Summer Road Trip Over? What an RV Detail Should Address Before Storage, from exterior protection to interior cleanup.

Luxury Tuscany motorcoach parked outdoors before RV detailing and storage preparation

Buying an RV? What You Should Know About Professional RV Detailing Before Your First Trip

Buying an RV is exciting. You start picturing open highways, family trips, and quiet campgrounds. Before loading the refrigerator and pulling out of the driveway, though, take a close look at the RV itself.

Professional detailing is not only about making a purchase shine. It can expose neglected areas, remove storage buildup, protect vulnerable surfaces, and create a clean maintenance baseline. Buying an RV? What you should know about professional RV detailing before your first trip is simple: work completed before mile one can prevent frustration later.

How long does it take to detail a RV?

Buying an RV? What You Should Know About Professional RV Detailing Before Your First Trip

A new-to-you RV may look clean while still carrying road film, oxidation, mildew, water spots, or grime around seals. Even brand-new units can arrive with transport dust or rushed dealership cleanup.

A proper first detail creates a baseline. Once the RV is clean, it becomes easier to notice future leaks, fading, staining, or damage.

At Speedy K’s, that attention comes from decades of hands-on work rather than grabbing a general cleaner from a store shelf. Kevin began working around boats as a teenager near Lake Erie, then studied coatings, gel coats, paint systems, fiberglass construction, and manufacturer recommendations. That careful approach matters with RVs because one process does not fit every surface.

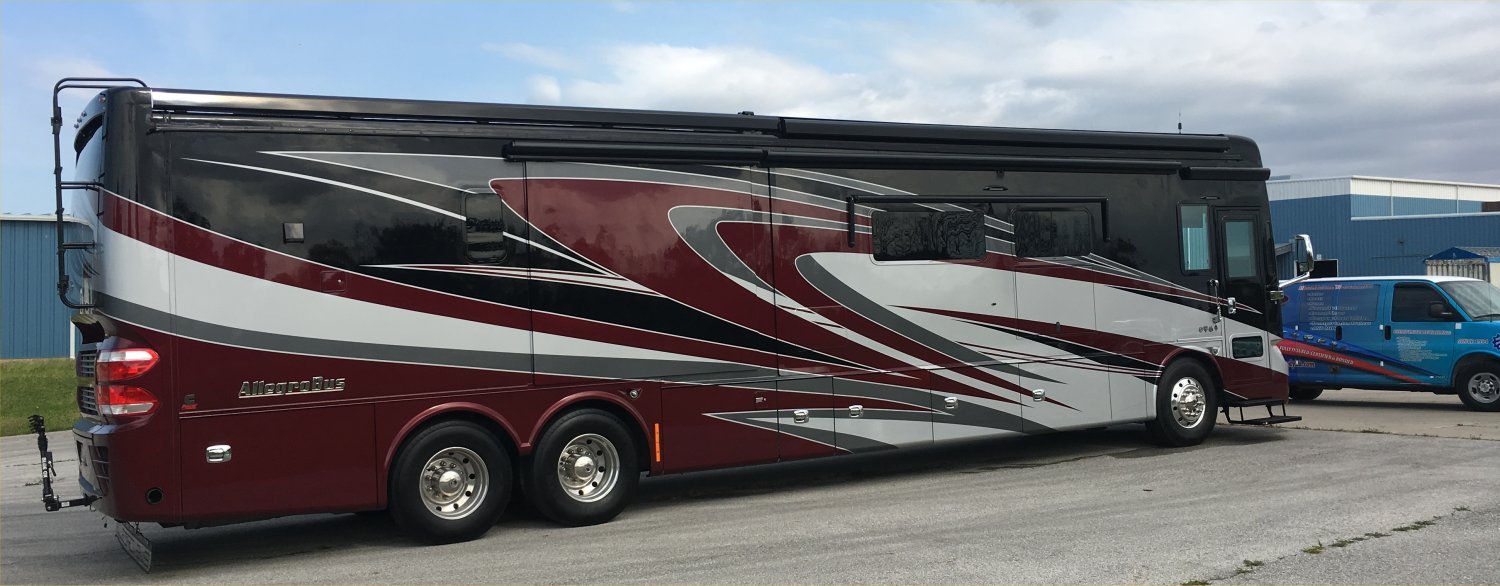
Maroon Class A motorhome parked outdoors beside a Speedy K’s detailing vehicle.

What does RV mean?

RV means recreational vehicle. The term includes motorhomes and towable units such as travel trailers, fifth wheels, folding campers, and truck campers. The RV Industry Association describes them as temporary living quarters designed for recreational, camping, or seasonal use.

That definition matters because “RV” covers very different designs. A Class A may have large painted panels, while a lightweight trailer may use thinner finishes, decals, aluminum, and fiberglass.

Before scheduling Detailing Services for RVs, provide the year, make, model, length, finish type, and current condition. These details help the professional select safer products and realistic service options.

Why professional detailing matters before the first trip

Your first trip will add bugs, dust, tree sap, and road grime. Starting with an unprotected surface lets those contaminants settle onto an already compromised finish.

A professional detail may also reveal issues missed during an emotional purchase. Dark streaks can show runoff patterns. Heavy oxidation may indicate long outdoor storage with little protection. Mildew around an awning or seal deserves attention before a humid weekend inside.

I tell owners to view detailing as part of the inspection process, not a cosmetic reward after everything else is done. It does not replace a mechanical or structural inspection, but careful cleaning gives you a clearer view of what you bought.

What RVs to stay away from?

Focus on condition instead of attacking a particular brand. Be cautious around RVs with soft floors, recurring roof leaks, mold odors, widespread delamination, badly cracked sealant, severe oxidation, missing maintenance records, or signs of rushed repairs.

Be careful when a seller refuses an independent inspection or will not let you test the slides, appliances, water system, generator, or leveling equipment. A quick wash and shiny tire dressing can make a neglected RV feel newer for an afternoon.

Check the VIN through the National Highway Traffic Safety Administration recall lookup before finalizing the purchase. Address open recalls and use the results to ask better questions about the unit’s history.

What is the best RV to buy for the money?

The best value is the RV that fits your actual travel habits without making you pay for space or systems you will rarely use. A couple taking short weekend trips may prefer a manageable travel trailer or Class B. A larger family staying for weeks may need a bunkhouse, fifth wheel, or Class C.

Look beyond the sale price. Consider the tow vehicle, fuel, insurance, storage, tires, maintenance, repairs, and detailing. A bargain that needs finish restoration, roof work, new seals, and odor treatment can quickly cost more than a well-maintained unit.

The best RV for the money often has documented care, a sound structure, a workable floor plan, and surfaces that can still be preserved. Buy for condition and use, not only appearance.

What should professional RV detailing include?

The right service depends on the RV, but a first-trip detail should begin with an evaluation. The detailer should identify the exterior material, test questionable areas, document existing damage, and explain what can and cannot be corrected.

Exterior work may include a hand wash, wheel cleaning, roof and awning cleaning, oxidation correction, polishing, decal treatment, and sealant. Interior work may cover vacuuming, hard-surface cleaning, upholstery treatment, odor treatment, sanitation, and commonly overlooked storage compartments.

Owners with several business units may approach maintenance through Company Fleet Detailing, while individual owners may prefer a custom package. The important part is matching the process to the material instead of using the strongest chemical available.

Why RV finishes require a trained approach

RVs combine materials that age differently. Painted panels, gel coat, fiberglass, aluminum, plastic trim, rubber roofing, glass, decals, sealants, and awnings may all require separate products and techniques.

Kevin has seen the challenge on fifth wheels and travel trailers with thin gel-coat layers or single-stage finishes. Owners sometimes expect every faded panel to return to factory-new condition, but a broken-down finish has limits. Correction can improve it, yet no honest detailer should promise to reverse material failure.

This is also why harsh automatic washes can create trouble. Strong chemicals and abrasive brushes may dull finishes, damage graphics, or strip protection. Mobile Auto Detailing adapted for RV surfaces gives the technician more control over pressure, products, tools, and problem areas.

What is the 3-3-3 rule for RV living?

The 3-3-3 rule is a flexible travel guideline used by many RV owners. A common version recommends driving no more than 300 miles in one day, taking a break about every three hours, and arriving at the campground by 3 p.m. Some travelers add staying three nights before moving again.

It is not a law, and every trip is different. Still, the rule encourages new owners to slow down. Driving or towing a large RV takes focus, and arriving early gives you daylight to park, level the unit, connect utilities, and handle surprises.

A clean, organized RV supports that calmer rhythm. When windows and mirrors are clear, storage areas are sorted, and exterior issues were handled before departure, the first setup feels less chaotic.

Maroon and tan Class A motorhome parked outdoors beneath trees.

How long should you allow for RV detailing?

The timeline depends on size, condition, access, weather, and the requested correction. A maintenance wash on a protected RV is very different from oxidation removal, roof cleaning, interior sanitation, and full polishing on a neglected fifth wheel.

For a clearer explanation, read How long does it take to detail a RV?. Schedule the work several days before departure instead of the night before. That leaves room for weather changes and time to address anything discovered.

Fast work is not automatically careless. Kevin explains that correct tools, tested products, and an established system can shorten a job without cutting corners. Experience should create efficiency, not rushed results.

How to choose a professional RV detailer

Ask how much experience the company has with your RV type and finish. Confirm that the business is trained, insured, and willing to explain its process. A trustworthy detailer should discuss expectations honestly and point out pre-existing damage.

Be cautious with booking hubs that collect payment and send an unknown subcontractor. You should know who is working on your RV, what products will be used, and whether the company stands behind the service.

Avoid promises that one coating will eliminate maintenance for years. Protection still requires upkeep. Kevin compares it to whitening your teeth: treatment may improve the result, but it does not mean you can stop brushing.

Start the first trip with a clean baseline

Before departure, complete the mechanical inspection, check tires, test lights and brakes, inspect seals, verify insurance, review recalls, and practice operating the RV. Schedule the detail early enough to avoid a last-minute rush.

Professional RV detailing helps protect the finish, improves visibility, refreshes the interior, and makes future changes easier to spot. It also gives a new owner confidence. You know what has been cleaned, what has been protected, and what may need attention next.

Your RV does not need to be flawless before the first trip. It should be safe, understood, and properly cared for. Start there, follow manufacturer guidance, and the shine becomes more than appearance—it becomes part of protecting the investment.

Rear side view of a black Class A motorhome parked outdoors beneath trees.

Can I use Dawn dish soap on my RV?

Can I use Dawn dish soap on my RV?

Is Dawn dish soap bad to wash a camper?

When RV owners ask “Can I use Dawn dish soap on my RV?” it usually comes from a desire to use a product they trust at home. Dish soaps like Dawn are well‑known grease cutters, and on a filthy RV the temptation is strong. Some bloggers and dealers even recommend a splash of Dawn for stubborn grime. However, there are hidden trade‑offs. According to professional detailers, Dawn is formulated to remove grease and baked‑on food, not to clean automotive finishes. In forums and detailing communities, experienced detailers caution that the product strips wax and protective coatings from paint. RVs are coated with gel coats, clear coats, waxes or sealants that help protect them from ultraviolet rays and oxidation. A strong degreaser can remove these protective layers and leave your camper vulnerable.

Using Dawn can cause catastrophic long-term harm. One can use it diluted to remove tough grease or insect splatter at the start of the season. Yet making it your go‑to wash solution can accelerate dulling of fiberglass and painted surfaces. It’s similar to washing your car with dish soap: it will be squeaky clean but the finish may turn flat. You don’t want to invest thousands of dollars in an RV only to have the exterior degrade because of your washing choice. The question “Can I use Dawn dish soap on my RV?” should therefore be followed with another: how often, and for what purpose? For routine washes, gentler formulas designed for vehicles are safer.

Understanding RV Surfaces and the Role of Protective Coatings

Before diving deeper into dish soap, it helps to understand what you’re washing. RV exteriors can be fiberglass, aluminum, painted metal, or gel‑coated composite. These materials are designed to withstand road debris, weather, and UV exposure, but only when sealed. Wax or synthetic sealants create a sacrificial barrier that shields the surface. Owners of new rigs often remark on the glossy sheen that repels water; this isn’t just aesthetic. Wax fills microscopic pores in the finish and slows oxidation. Once the wax is stripped, the porous gel coat or paint absorbs contaminants and begins to oxidize, turning chalky.

Dish soaps are alkaline degreasers. They’re formulated to cut through fatty organic molecules, which is why they’re brilliant on pans. On an RV they don’t discriminate between bug guts and protective wax. An automotive detailing forum notes that the original blue Dawn is fine “to use as a strip wash to remove the wax” and that the product should not be used for regular car washing because “it does remove the wax”. Repeated washing with a strong degreaser will dull the shine and can lead to faded fiberglass or vinyl decals. Once the shine is gone, restoring it requires laborious polishing or professional detailing.

RV Roof and Awning Considerations

Your RV’s roof is perhaps the most critical area to maintain. Many newer rigs use EPDM or TPO rubber membranes, while older models may have aluminum or fiberglass. Roof membranes are more delicate than sidewalls, and improper cleaning can lead to leaks. Manufacturer guidance typically calls for non‑abrasive cleaners. Alpha Systems, a supplier of TPO membranes, recommends “using a non‑abrasive household cleaner, such as dish soap” and warns against harsh products, instructing owners to thoroughly rinse the roof and sidewalls after cleaning. This tells us that a mild dish soap diluted in plenty of water can be used on the roof when followed by a complete rinse.

However, not all dish soaps are created equal. Dawn is a strong degreaser and produces heavy suds. On rubber roofs, excessive suds can be hard to rinse completely, leaving residue that attracts dirt. Repeated use of strong detergents might also dry out rubber membranes. Some roof manufacturers include conditioners to keep rubber supple; Dawn does not replace these. If you do employ dish soap on the roof, mix a small amount with a large volume of water and scrub gently with a soft‑bristle brush. Always rinse until no bubbles remain and inspect seams and sealant afterwards. For vinyl awnings, the same caution applies: avoid undiluted chemicals and follow with a protectant designed for vinyl.

Can I use Dawn dish soap on my RV?

Can I use Dawn dish soap on my RV? Impacts on Wax and Sealants

So, can I use Dawn dish soap on my RV? The answer depends on whether you’re prepared to reapply wax. Detailing professionals sometimes use Dawn as a “strip wash” when they intend to polish and rewax a vehicle. An experienced detailer on a car detailing forum explains that the product is fine for removing wax but should not be used as a regular wash soap. In other words, if you’re planning a full paint correction and need to remove old wax or sealant, Dawn will help ensure bare paint. If you just want to maintain your RV’s finish, there are better choices.

For example, specialized RV soaps are pH‑balanced and include lubricants that lift dirt without harming wax. Many also contain gloss enhancers. Using them preserves the protective layer, meaning you can go longer between waxing sessions. If you decide to use Dawn for a heavy clean, follow up with a quality wax or sealant. This reestablishes the barrier against UV rays and water spots. An unprotected finish will oxidize quickly, especially on sun‑exposed surfaces like the top of a fifth wheel or travel trailer.

Detailers also warn about the effect of dish soap on decals and graphics. Vinyl graphics rely on plasticizers to remain flexible. Strong detergents can strip oils and make them brittle over time. While one wash won’t destroy them, regular use might lead to cracking or peeling. Opt for a cleaner that specifically states it’s safe for decals.

Is it bad to use Dawn in RV sewage tank?

The internet is full of “tank hacks” that involve pouring Dawn down the drain. Some swear by adding a cup of dish soap to the black or gray tank to break up waste and grease. Others argue that the suds cause more problems than they solve. The truth, as usual, lies in the details. An RV sensor maintenance guide recommends using Dawn Ultra dish soap to clean grease and soap residue on gray tank sensors, advising owners to pour around 20 ounces of Dawn into the gray tank, let it sit overnight, then flush. The same guide notes that Dawn is a “fantastic grease‑eater” and safe for bacteria when used in the gray tank. This suggests that Dawn can help dissolve grease films that interfere with sensor readings.

However, you should avoid pouring large amounts of dish soap into the black tank. The black tank relies on bacteria and enzymes to break down waste. Surfactants from dish soap can disrupt this process and create voluminous suds. KleenTank, a professional tank cleaning company, cautions that excessive soap can build up and even clog the system. Because dish soap lacks the enzymes needed to break down solid waste, using it as a primary tank treatment is ineffective. If you use Dawn for gray tank maintenance, do so sparingly and rinse thoroughly. For routine tank care, choose enzyme‑based treatments designed for RV waste systems.

Can I use Dawn dish soap on my RV?

When is Dawn Acceptable?

Although this blog emphasizes caution, there are scenarios where Dawn proves useful. It excels at cutting through greasy messes. If you return from a trip with a front cap plastered in insect remains or road tar, a dilute solution of Dawn can loosen the grime. Use one or two tablespoons per gallon of water, a ratio suggested by some RV cleaning guides. Pre‑rinsing and working section by section will prevent the soap from drying. As soon as the bugs are gone, rinse thoroughly. Follow up with a dedicated RV wash to restore lubrication and finish.

Dawn can also help clean heavily stained vinyl awnings or wheel wells where automotive wax is absent. In these cases, its degreasing power is an advantage. It is often part of a “strip wash” before applying ceramic coatings. After the heavy clean, always protect the cleaned surfaces with wax or a UV protectant. This ensures that the cleaning session doesn’t leave surfaces exposed.

Safer Alternatives: Specialized RV Cleaners

Choosing the right soap is about balance. You want something that removes dirt without stripping protective layers. Products marketed as RV or marine washes are formulated to do just that. They are pH‑balanced, low‑sudsing, and often biodegradable. Many include UV inhibitors. A specialized soap also tends to rinse cleanly, reducing the likelihood of streaking. Some even contain conditioners to replenish moisture in rubber seals. Using such products means you can ask “Can I use Dawn dish soap on my RV?” less often.

Another alternative is a waterless wash. These spray‑on cleaners lift dirt into solution and wipe away with a microfiber towel. They’re handy when water is scarce and contain polymers that leave behind a protective gloss. For roof cleaning, some manufacturers suggest cleaning three to four times per year with dish soap or a dedicated roof cleaner. No matter the product, always test in an inconspicuous area and follow the manufacturer’s recommendations. When in doubt, consult your owner’s manual.

Professional Care and Detailing

Sometimes, you might prefer to leave the cleaning and maintenance to professionals. Professional detailers have the tools, products, and expertise to clean, polish and protect your RV without damaging sensitive materials. They know how to safely remove oxidation, repair minor scratches and apply durable ceramic coatings. If your RV has lost its shine after years of cleaning with dish soap, a professional detailer can restore it.

At this point it’s worth exploring RV/Coach/5th Wheel/Travel Trailer Packages that outline various detailing levels. These detailing services often include washing, decontamination, polishing, waxing, and interior cleaning. Many companies also offer Detailing Services for RVs to keep your investment in top condition. If you’re concerned about roof maintenance, RV Roof and Awning Cleaning services can ensure that membranes are cleaned with the right products and resealed if necessary.

Professional detailing not only saves time but also prolongs the lifespan of your RV’s finishes. Regular professional care can delay oxidation and maintain resale value. For readers curious about the benefits, the article What are the benefits of RV detailing? explains how regular detailing protects your investment, improves appearance, and prevents expensive repairs.

Weighing Pros and Cons: A Quick Reference Table

Below is a table summarizing when using Dawn might make sense and when to avoid it.

ScenarioUse Dawn?Notes
Removing heavy grease, bugs, or sapOccasionallyDilute heavily (1–2 tablespoons per gallon) and rinse thoroughly. Follow with RV soap and wax.
Routine exterior washingAvoidDish soap strips wax; use pH‑balanced RV wash to preserve protective coatings.
Cleaning rubber roofUse MildlyManufacturers allow dish soap but recommend non‑abrasive cleaners and thorough rinsing. Add a protectant after cleaning to prevent drying.
Gray tank sensor maintenanceYes (limited)Use 20 oz in gray tank to break down grease films; flush thoroughly. Not effective for black tanks; choose enzyme treatments.
Preparing for polishing/waxingYesUse as a strip wash to remove old wax before applying new wax or sealant.

Conclusion: Proceed with Caution and Knowledge

Dish soaps like Dawn have a place in RV maintenance, but they’re not the everyday wash solution. Understanding how they work helps answer the question “Can I use Dawn dish soap on my RV?” effectively. Used sparingly, they’re handy for cutting through stubborn grime or prepping for a full detail. Overused, they can strip protective waxes, dull finishes and dry out components. Always dilute, rinse thoroughly, and follow up with proper protection. When in doubt, reach for a product formulated specifically for RVs or enlist professional help to keep your home on wheels shining mile after mile.

Can I use Dawn dish soap on my RV?

How long does it take to detail a RV?

An RV is more than a vehicle. It functions as transportation, living space, and often a long-term investment. Because of its size and complexity, detailing an RV requires significantly more time than detailing a typical car or SUV.

Unlike smaller vehicles, recreational vehicles include large exterior panels, roof membranes, awnings, trim, wheels, and interior living spaces. Each area requires careful cleaning and protection. When done properly, RV detailing restores shine, removes road grime, and helps protect surfaces from sun damage, oxidation, and environmental contaminants.

Many RV owners choose professional services such as Detailing Services for RVs, Company Fleet Detailing, or Mobile Auto Detailing because detailing large vehicles requires specialized equipment and experience. Professional detailers understand how to safely clean fiberglass panels, roof materials, and delicate decals without causing damage.

Understanding the timeline involved helps RV owners schedule maintenance and choose the right level of service.


How long does it take to detail a RV?

The time required to detail a recreational vehicle varies depending on the size of the RV and the services performed. In many cases, a simple wash and wax may take only a few hours, while a full restoration detail may require most of the day.

Professional detailers offering Detailing Services for RVs typically estimate service time based on the length of the vehicle and its condition. RVs exposed to heavy road grime, sun exposure, or oxidation may require additional polishing and cleaning steps.

For many RV owners, the question of how long does it take to detail a RV comes down to the level of service requested. A maintenance wash is relatively quick, while a full exterior correction and protection process takes significantly longer.

How long does it take to detail a RV?

Typical RV detailing timeline by vehicle size

The size of the RV plays a major role in determining how long detailing will take. Larger motorhomes have more surface area, taller roofs, and additional components that must be cleaned carefully.

RV TypeTypical Detail Time
Small camper or trailer (under 20 ft)3–5 hours
Travel trailer (20–30 ft)4–6 hours
Class C motorhome6–8 hours
Class A motorhome (30 ft+)8–12+ hours

Large motorhomes can sometimes require two full days if paint correction or oxidation removal is necessary. Many providers offering Mobile Auto Detailing schedule full-day appointments for larger vehicles.

**NOTE: The times from the experts at Speedy K’s Mobile Detailing are typically a bit lower, due to experience with different makes and models.


How long does a full detail usually take?

A complete RV detail includes much more than simply washing the vehicle. Professional detailing involves a multi-step process designed to restore and protect the RV.

A typical full detail may include:

  • Roof cleaning and treatment
  • Exterior washing and decontamination
  • Bug and road grime removal
  • Oxidation correction and polishing
  • Wax or protective sealant application
  • Wheel and tire cleaning
  • Window and trim cleaning
  • Interior vacuuming and sanitation

Each step requires time and careful attention to detail. For example, oxidation removal from fiberglass panels can take several hours alone.

Businesses that offer Company Fleet Detailing often use multiple technicians to complete large RV details more efficiently.

How long does it take to detail a RV?

Factors that affect how long it takes to detail a RV

Several variables determine the total time required for an RV detailing service.

Size of the RV

Larger motorhomes require more cleaning time simply because of their surface area. A 40-foot Class A motorhome may have hundreds of square feet of exterior panels.

Condition of the vehicle

RVs that have been exposed to bugs, road salt, or heavy sun exposure often require additional cleaning and polishing.

Service level

A quick wash will take far less time than a full restoration detail with paint correction or ceramic coating.

Equipment and crew

Professional Mobile Auto Detailing teams work faster because they use specialized equipment and experienced technicians.


How difficult is RV maintenance?

Maintaining an RV is more complex than maintaining most passenger vehicles. RVs contain several different materials including fiberglass, rubber roofing, vinyl decals, aluminum trim, and interior upholstery.

Cleaning these surfaces incorrectly can cause damage. Using harsh chemicals may fade decals or remove protective coatings. Roof systems also require careful cleaning to prevent damage to seals and membranes.

Because of these challenges, many owners rely on professional Detailing Services for RVs instead of attempting major detailing projects themselves.

If you want to understand the long-term advantages of professional detailing, this guide explains What are the benefits of RV detailing? and why routine maintenance helps protect RV value.


How much should I charge to detail an RV?

Detailing businesses typically price RV services based on the length of the vehicle. Charging per foot helps account for the increased labor required for larger RVs.

Typical pricing ranges include:

  • Basic wash: $5–$8 per foot
  • Wash and wax: $8–$15 per foot
  • Full restoration detail: $20–$40 per foot

Companies offering Company Fleet Detailing may also provide discounted rates for multiple vehicles or ongoing service contracts.


How much should it cost to detail an SUV?

Some RV owners compare RV detailing costs to passenger vehicles. However, the difference in size and labor is significant.

A typical SUV detail may cost between $150 and $300 depending on the services performed. RV detailing often costs significantly more because of the time required to clean the roof, sides, wheels, and interior living areas.


How often should you detail an RV?

Routine detailing protects an RV from environmental damage and helps maintain its resale value. Many professionals recommend a full detail every six to twelve months depending on storage conditions and usage.

RVs that are stored outdoors or frequently used for travel may benefit from more frequent cleaning. Regular Mobile Auto Detailing services help prevent buildup of bugs, dirt, and oxidation that can damage surfaces over time.

How long does it take to detail a RV?

What are the benefits of RV detailing?

Owning a recreational vehicle is about more than getting from point A to point B; it’s about creating a comfortable home on wheels. Just like a house, an RV demands maintenance to stay safe, efficient and inviting. Regular detailing is the cornerstone of that care. Far from being a vanity service, detailing protects your investment, keeps you healthy on long journeys and ensures you enjoy every mile. In the following sections, you’ll see what are the benefits of RV detailing? unfold in detail.

Protecting and Extending Your RV’s Lifespan: What are the benefits of RV detailing?

A motorhome’s exterior constantly faces sun, rain, salt, road grime and bird droppings, all of which accelerate fading, oxidation and corrosion. Professional detailing includes washing, polishing and applying waxes or ceramic coatings that block ultraviolet damage and repel contaminants. When wax and sealants are regularly applied, surfaces stay shiny and resist dirt, so grime doesn’t embed deeply and cleaning becomes easier. Keeping the paint, rubber seals and roof protected prolongs the lifespan of fiberglass panels and prevents costly repairs down the road. In short, routine detailing is like sunscreen for your RV: it shields the exterior from premature wear and tear.

Preserve seals, graphics and roof components

Professional detailers know that an RV is more than a large car. Each component—fiberglass panels, aluminum trim, vinyl graphics, rubber gaskets and roof membranes—requires specific cleaning agents and techniques. Using the wrong product can cause streaking or seal damage. Detailers gently remove bug splatter and road tar, clean and condition seals and apply specialty coatings to graphics so they don’t fade or crack. They also clean the roof and awnings, which are often neglected but crucial to preventing leaks. Protecting these vulnerable areas extends the service life of your RV and ensures everything stays watertight.

Improving Interior Comfort and Health: What are the benefits of RV detailing?

Long trips turn an RV into a mobile living room, kitchen and bedroom. Over time, dust, sand, mildew and odors accumulate in carpets, upholstery and vents. Professional interior detailing goes beyond a quick vacuum; it involves deep‑cleaning and sanitizing every surface. Detailers vacuum carpets, shampoo upholstery, clean vents and wipe down counters and appliances so that allergens, bacteria and stale odors are removed. A fresh interior makes your vehicle feel like a proper home and promotes a healthier environment, especially if you travel with children or pets. In addition, sanitized kitchens and bathrooms reduce the risk of food‑borne illnesses and mold.

Air quality matters

Air quality inside an RV affects your comfort and well‑being. Professional detailers use non‑toxic cleaners and steam to neutralize odors and kill microbes, ensuring the air you breathe is clean. Clean vents and upholstery also reduce allergens and dust, which can otherwise trigger respiratory issues or allergies. Regular detailing therefore contributes to better sleep and overall comfort during extended stays on the road.

What are the benefits of RV detailing?

Boosting Fuel Efficiency and Performance

A clean exterior isn’t just about looks—it can also improve your mileage. Dirt and grime create aerodynamic drag, forcing your engine to work harder and consume more fuel. By washing away contaminants and waxing the surface, you reduce drag and help the RV slip through the air more efficiently. Proper detailing also includes cleaning and inspecting tires; detailers check inflation and remove debris from treads so rolling resistance stays low, further improving fuel economy. Additionally, by keeping windows, mirrors and lights clear, detailing ensures optimal visibility and safer handling.

Mechanical peace of mind

During detailing, professionals often spot issues that an untrained eye might miss. Inspecting lights, wipers and seals can reveal small problems before they become costly repairs. They may even notice signs of leaks or mechanical wear, prompting timely maintenance. These proactive checks contribute to a smoother ride and reduce the risk of breakdowns on your next adventure.

Enhancing Safety and Visibility

Driving a large RV demands clear sightlines. Clean windows, mirrors and exterior lighting are essential for safe lane changes and reversing. Professional detailers meticulously clean glass inside and out and polish headlight lenses so you can see and be seen. They also apply rain‑repellent treatments to windshields, which improve visibility in wet conditions. By keeping tires free of debris and checking tread depth, detailers support better traction and handling. Enhanced visibility and vehicle control translate into safer journeys, especially on narrow mountain roads or in poor weather.

Enhancing Resale Value and Curb Appeal

A well‑detailed RV looks newer and better cared for, making it more attractive to potential buyers. Maintaining shiny paint, clean trim and spotless interiors signals that the owner has invested in proper upkeep. When it comes time to sell or trade in your RV, consistent detailing can command a higher price. Industry professionals note that buyers are willing to pay more for vehicles that show no signs of neglect or damage. Even if you never intend to sell, keeping your RV pristine enhances your pride of ownership every time you arrive at a campground.

Showroom shine matters

Detailing doesn’t just remove dirt; it restores the gloss and depth of color. Services like polishing, buffing and applying sealants eliminate swirl marks and oxidation. Polished metal trim and cleaned wheels catch the eye, while conditioned rubber seals and vinyl graphics resist cracking. With the right maintenance, your RV will continue to turn heads long after it leaves the factory.

What does an RV detailer do?

An RV detailer performs a systematic cleaning, restoration and protection of your vehicle’s exterior and interior. The work goes far beyond a simple wash. Detailers use specialized soaps and waxes to wash the body, polish and wax the paint, treat tires and wheels, clean and polish metal trim and remove bugs and tar. They clean windows, awnings and exterior appliances, and may even remove light scratches or swirl marks through compound buffing. Inside, they vacuum and shampoo carpets and upholstery, clean leather, remove stains, polish wood surfaces and eliminate odors. Sanitizing kitchens and bathrooms and disinfecting surfaces ensures your RV is hygienic and comfortable. In essence, a detailer acts as both a mechanic of cleanliness and a guardian of your RV’s materials.

Specialized expertise

Detailing an RV requires specialized tools and knowledge. Professionals understand how different materials—fiberglass, gel coat, aluminum and vinyl—react to cleaners and polishes. Using inappropriate products can damage seals or fade graphics. The expertise of a detailer ensures that every surface is treated properly, preserving the vehicle’s integrity. Many companies offer tailored packages like the Vehicle Car Care Package, Mobile Auto Detailing or Company Fleet Detailing, allowing owners to choose services that match their needs and budget.

What is the 3‑3‑3 rule for RV living?

The 3‑3‑3 rule is a guideline for pacing road trips: drive no more than 300 miles per day, stay at least three nights at each campground and arrive by 3 p.m. each day. Limiting driving to around four hours prevents fatigue and leaves time for sightseeing and rest. Staying three nights allows you to fully set up your site, explore the area and avoid the stress of packing up daily. Arriving by mid‑afternoon increases your chances of finding a good campsite and gives you time to resolve any issues with hookups before nightfall. While not a hard rule, following these guidelines can make long RV trips safer and more enjoyable.

Travel smarter, not harder

By slowing your pace, you conserve energy and reduce wear on your vehicle. Keeping drives short reduces stress and gives you time to appreciate scenic routes or local attractions. Arriving early means daylight for backing into your spot and settling in. Adhering to the 3‑3‑3 rule aligns with the goal of what are the benefits of RV detailing?—both aim to ensure your travel experience remains comfortable, safe and worry‑free. For a deeper dive into travel pacing, check out this 3‑3‑3 rule of RV travel article from Cruise America.

What is the purpose of detailing?

The primary purpose of detailing is to restore and protect your vehicle. Over time, dirt, road salt and ultraviolet exposure break down paint, trim and interior surfaces, which can reduce resale value and compromise comfort. Detailing removes contaminants, polishes surfaces and applies protective coatings to slow future damage. Professionals vacuum and shampoo interiors, condition leather, clean vents and apply waxes or sealants so that your RV looks better and lasts longer. The end result is a vehicle that not only looks fresh but is better protected against environmental hazards.

Maintenance versus vanity

Some owners think detailing is purely cosmetic. In reality, it’s preventative maintenance. Polishing and waxing are analogous to oil changes; they preserve materials and prevent expensive repairs later on. Detailing also keeps the interior healthy by removing bacteria and allergens. Investing in routine detailing is therefore an investment in longevity and health, not just aesthetics.

How much do you typically charge per foot when you’re detailing an RV?

Pricing varies based on size, condition and the level of service. For a 35‑foot RV, industry experts estimate costs ranging from $8 to $40 per linear foot, putting a full detail between $280 and $1,400. A basic wash usually falls at the lower end—about $8 to $10 per foot—while a thorough exterior wax, roof and awning cleaning, oxidation removal and polishing drive the price higher. High‑end treatments like ceramic coatings or paint protection films add cost but provide long‑term protection and shine. In many cases, packages such as Vehicle Car Care Package, Mobile Auto Detailing or Company Fleet Detailing allow owners to bundle services at a predictable per‑foot rate.

Factors influencing price

Several factors affect the final cost of detailing. The RV’s condition matters: oxidation, mold or algae growth require more time and labor to remove. Your location and local labor rates can also influence price. Additionally, frequency plays a role; regular customers often receive discounts from service providers. When comparing quotes, consider what’s included—hand washing, bug and tar removal, roof cleaning, waxing, window cleaning, tire and wheel detailing and interior carpet shampooing. Higher initial costs for premium products can save money in the long run by reducing the need for repairs.

Why professional detailing beats DIY

Detailing an RV yourself can be tempting, but the scale of the job is overwhelming. A large RV requires hours of washing, buffing and cleaning, and without professional equipment it’s easy to miss spots or cause damage. Professional detailers have pressure washers, polishers, steam cleaners and scaffolding to reach every corner safely. They also possess the training to select the right products for each surface, avoiding harm to seals or graphics. Investing in a pro detail saves you countless hours and ensures that your RV receives the thorough care it deserves.

Save time and protect value

Cleaning a big vehicle can easily become an all‑day task, taking away precious leisure time. Hiring a detailer frees you to focus on planning your trip or enjoying your destination. Consistent professional detailing preserves your RV’s value and demonstrates to future buyers that you’ve maintained it properly. To explore how RV care differs from automotive detailing, read RV Detailing vs. Car Detailing. This guide underscores why specialized techniques are essential for large coaches and offers insights into selecting the right Vehicle Car Care Package or Mobile Auto Detailing for your needs.

The bottom line

Routine RV detailing is more than cosmetic—it’s an investment in comfort, safety, performance and long‑term value. By protecting surfaces from UV damage and corrosion, you extend the lifespan of your RV. Deep interior cleaning removes allergens, bacteria and odors, making long trips healthier and more enjoyable. A clean exterior cuts aerodynamic drag and, together with properly maintained tires, can improve fuel efficiency. Cared‑for vehicles command higher resale prices and reflect your pride of ownership. Whether you’re preparing for a cross‑country adventure or thinking about resale, investing in professional detailing and choosing the right service package ensures your home on wheels stays beautiful and ready for whatever road lies ahead.

Table: Key Benefits of Regular RV Detailing

BenefitHow it helpsRelated services
Protects exteriorShields paint, graphics and seals from UV, moisture and contaminantsWaxing, ceramic coatings, Vehicle Car Care Package
Interior comfort & healthRemoves dust, allergens and odors; sanitizes surfacesDeep cleaning, upholstery shampooing, Mobile Auto Detailing
Fuel efficiency & performanceClean surfaces reduce drag; tire care improves mileageExterior wash, tire cleaning
Safety & visibilityClear windows, lights and mirrors enhance driving safetyGlass polishing, light inspection
Resale valueWell‑maintained RVs fetch higher pricesFull detailing packages
Time savingsProfessionals handle laborious tasks, freeing your scheduleCompany Fleet Detailing, Vehicle Car Care Package
What are the benefits of RV detailing?